Do you want to optimize your Instagram outreach efforts by uploading profiles via CSV and automating your messaging campaign? ReachOwl makes this process simple.
In this blog, we’ll show you how to upload Instagram profiles using a CSV file and set up a message sequence campaign with ReachOwl.
Step 1: Create a New Campaign
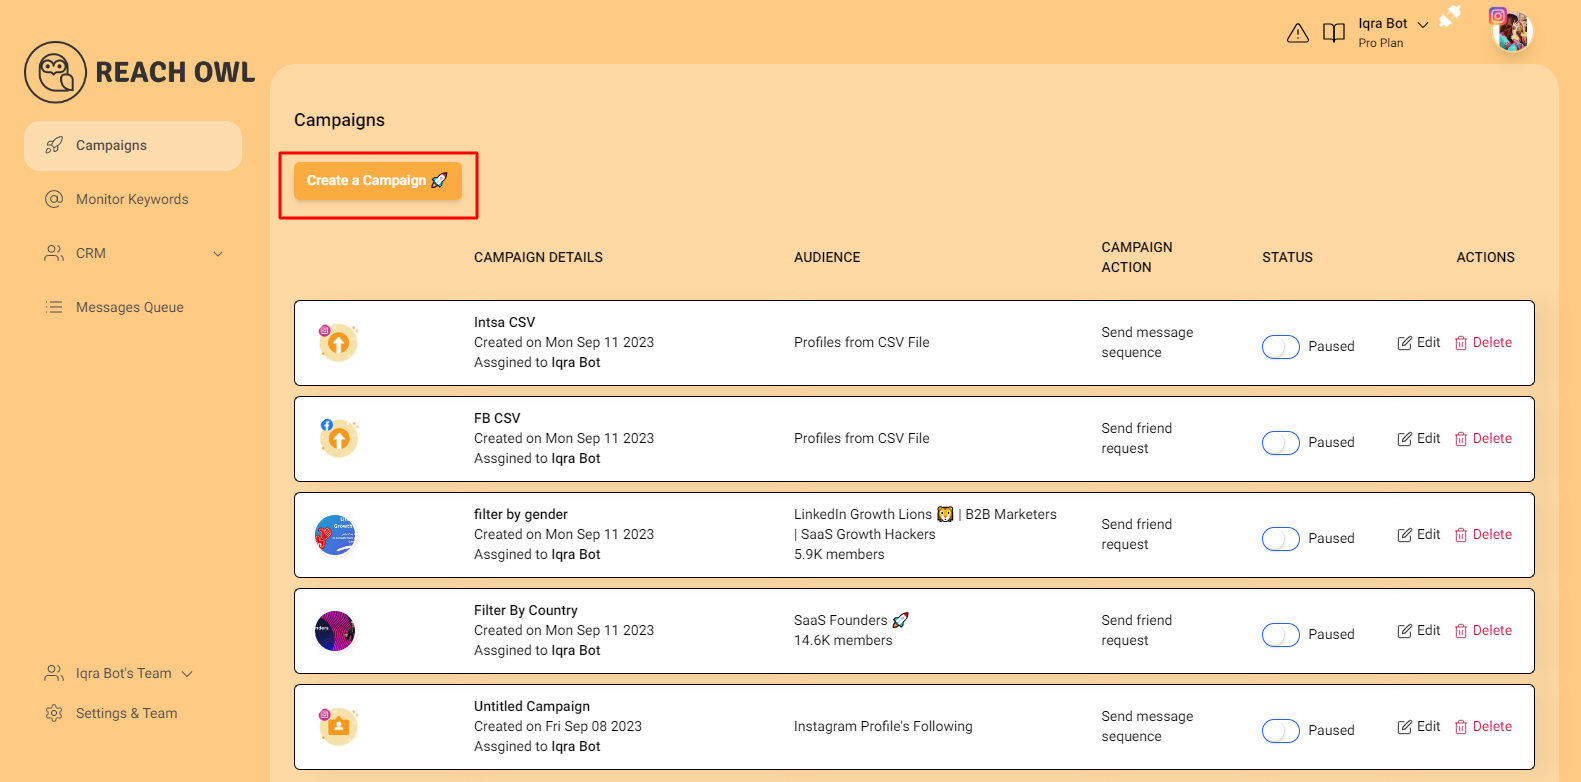
Start by logging into your ReachOwl account and select the “Create Campaign” option.
Step 2: Upload Your CSV File
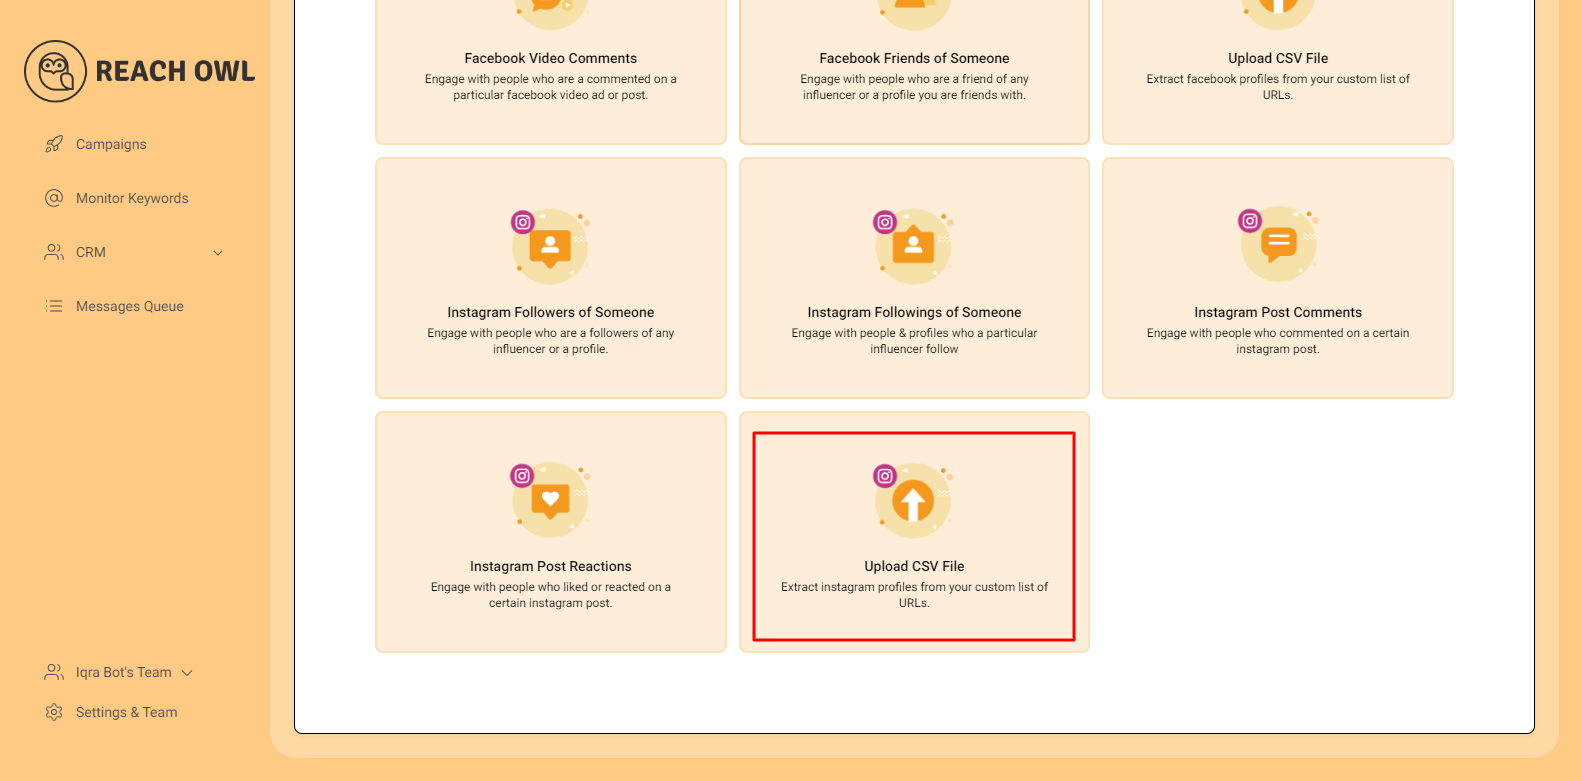
Scroll down in the campaign creation options and click on “Upload CSV file.”
Step 3: Choose Your CSV File

Click on the “Choose File” option to select and upload your CSV file containing Instagram profile URLs. Ensure that your CSV file is formatted correctly to include the necessary profile information.
Note: If you don’t define a ‘name’ column in the CSV column, ReachOwl will automatically use the Instagram username from everyone’s Instagram profiles. Therefore, you need to either put the full name in a column labeled ‘name’, or you can separate the first name and last name.
Step 4: Proceed to the Next Step
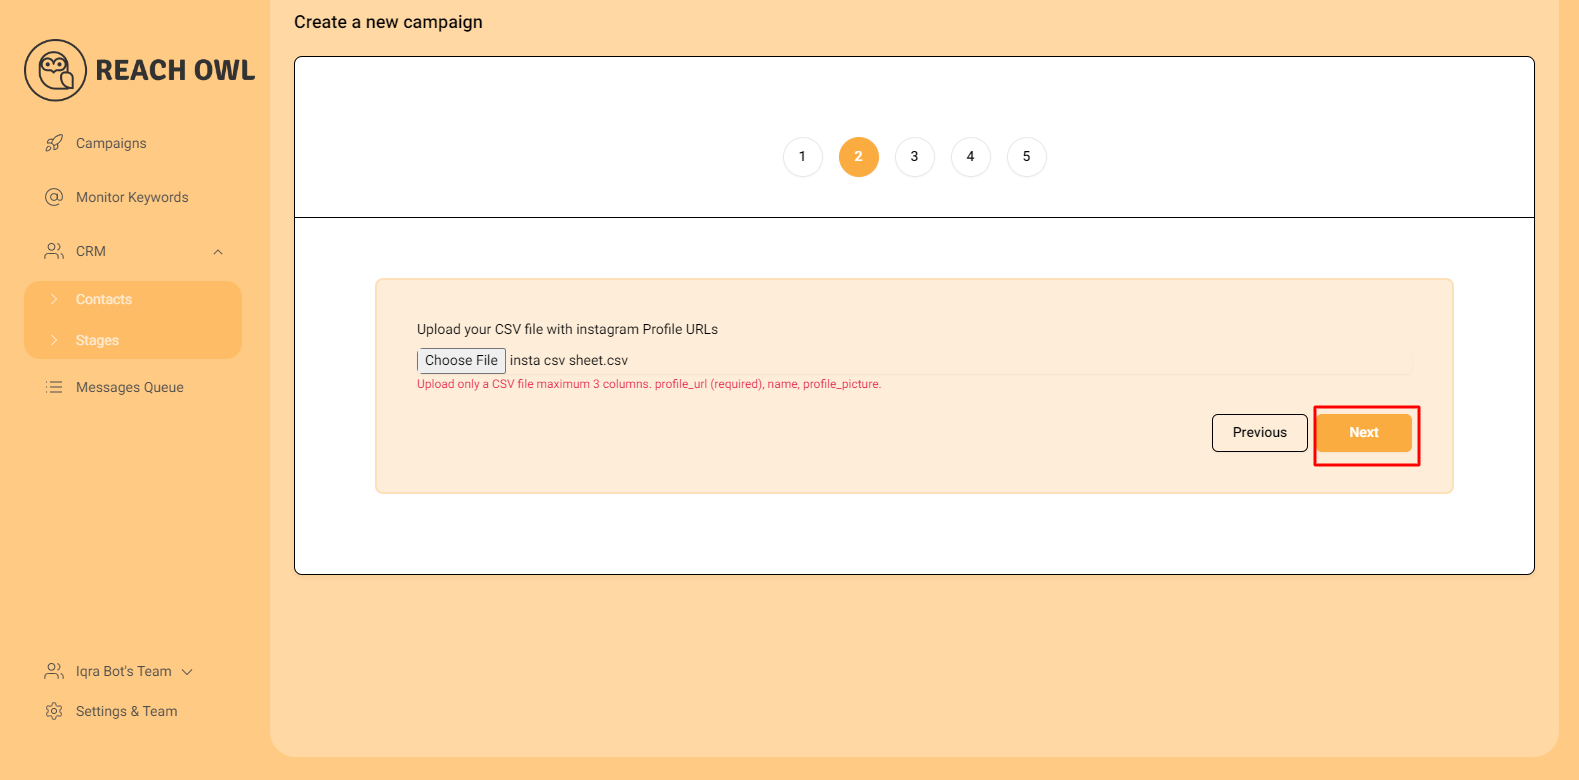
After successfully uploading the CSV file, click on “Next” to continue.
Step 5: Choose a Message Sequence Campaign Option
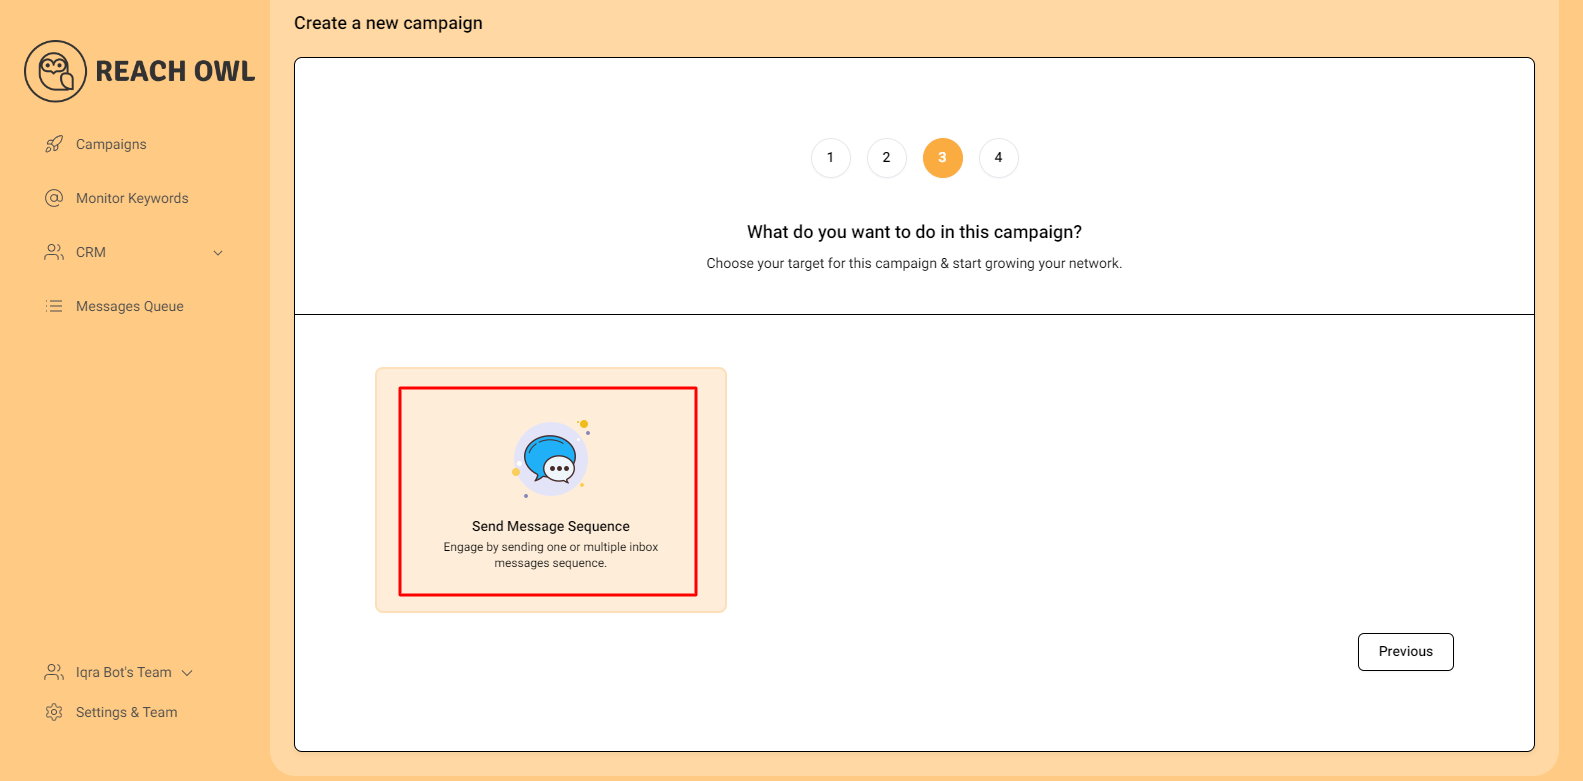
In the campaign setup, choose the “Message Sequence Campaign” option. This selection allows you to automate your messaging sequence.
Step 6: Name your Campaign

Create a descriptive name for your campaign. This name will help you easily identify the campaign within ReachOwl.
Step 7: Select the Account to Run Your Campaign
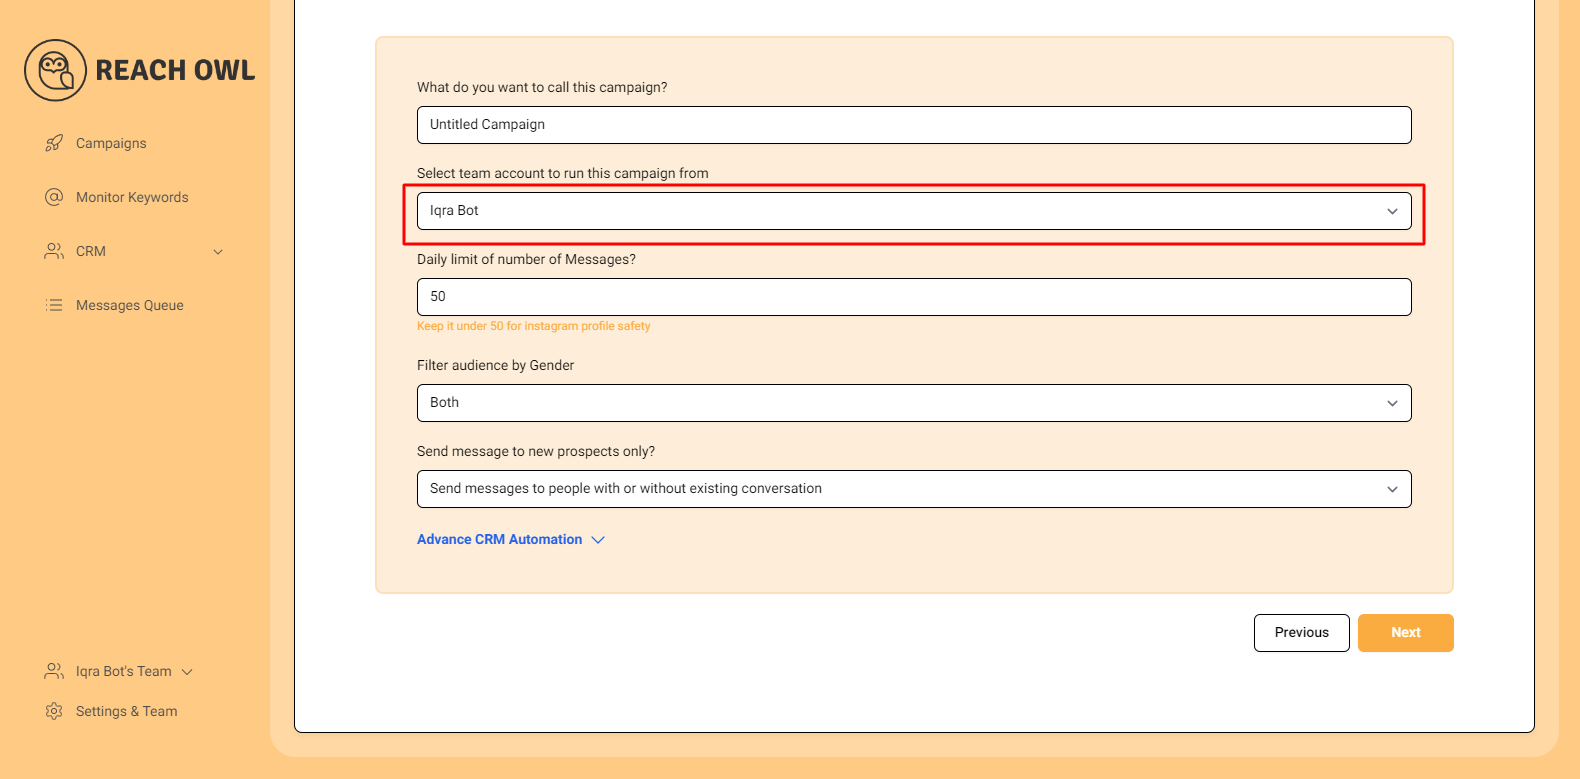
Choose the account from which you want to run the message campaign.
Step 8: Set Up a Daily Limit on the Number of Request

If you want to control the number of messages sent per day, you can set a daily limit.
Step 9: Filter by Gender

In this step, you can specify the gender you want to target. ReachOwl allows you to filter users by gender, ensuring that your friend requests are directed at your desired demographic.
Step 10: Send messages to new prospects only?
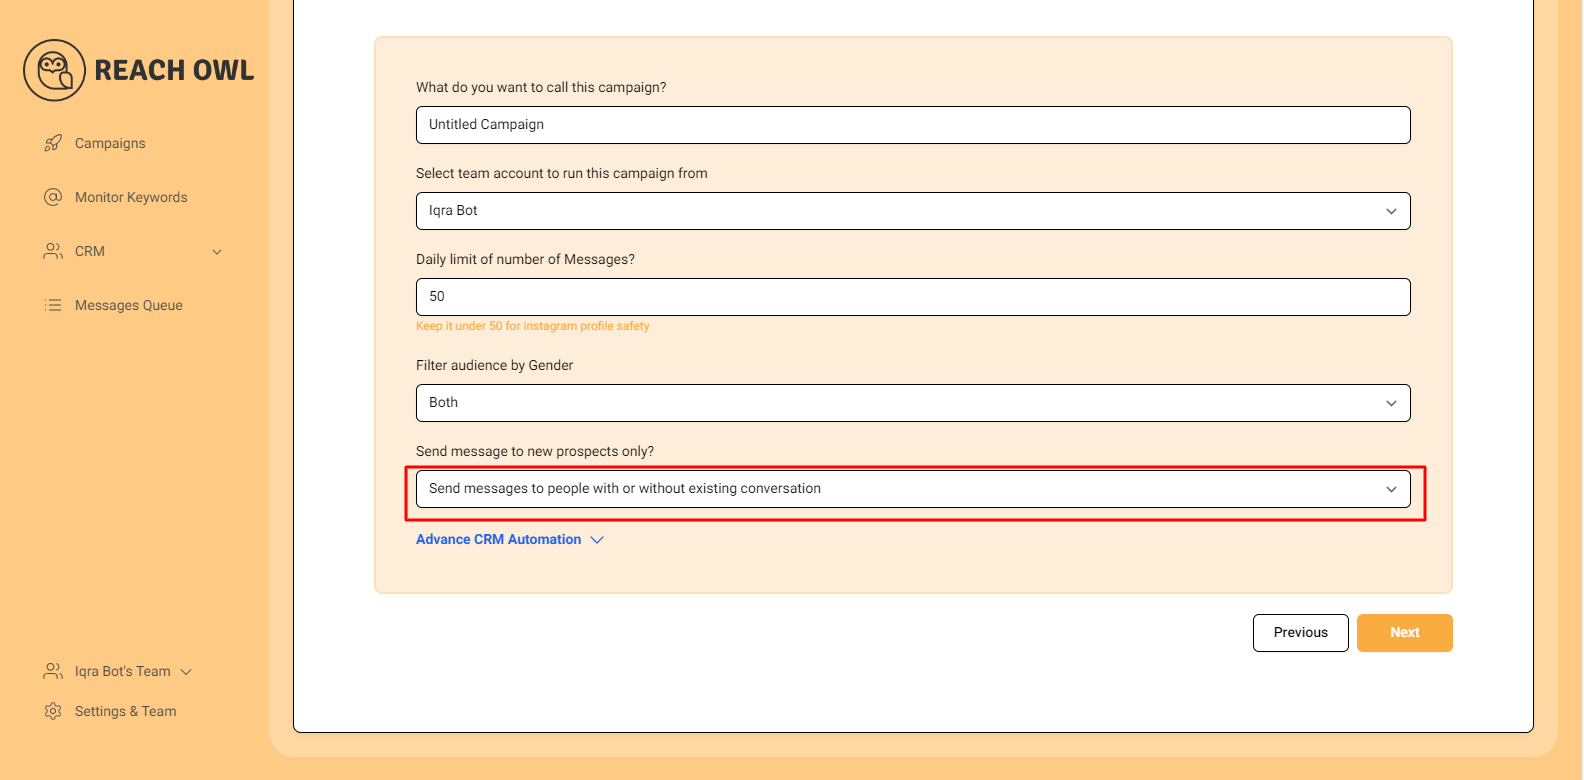
You can choose whether you want to send the campaigns to new people or to the people you already have conventions with.
Step 11: Click Next
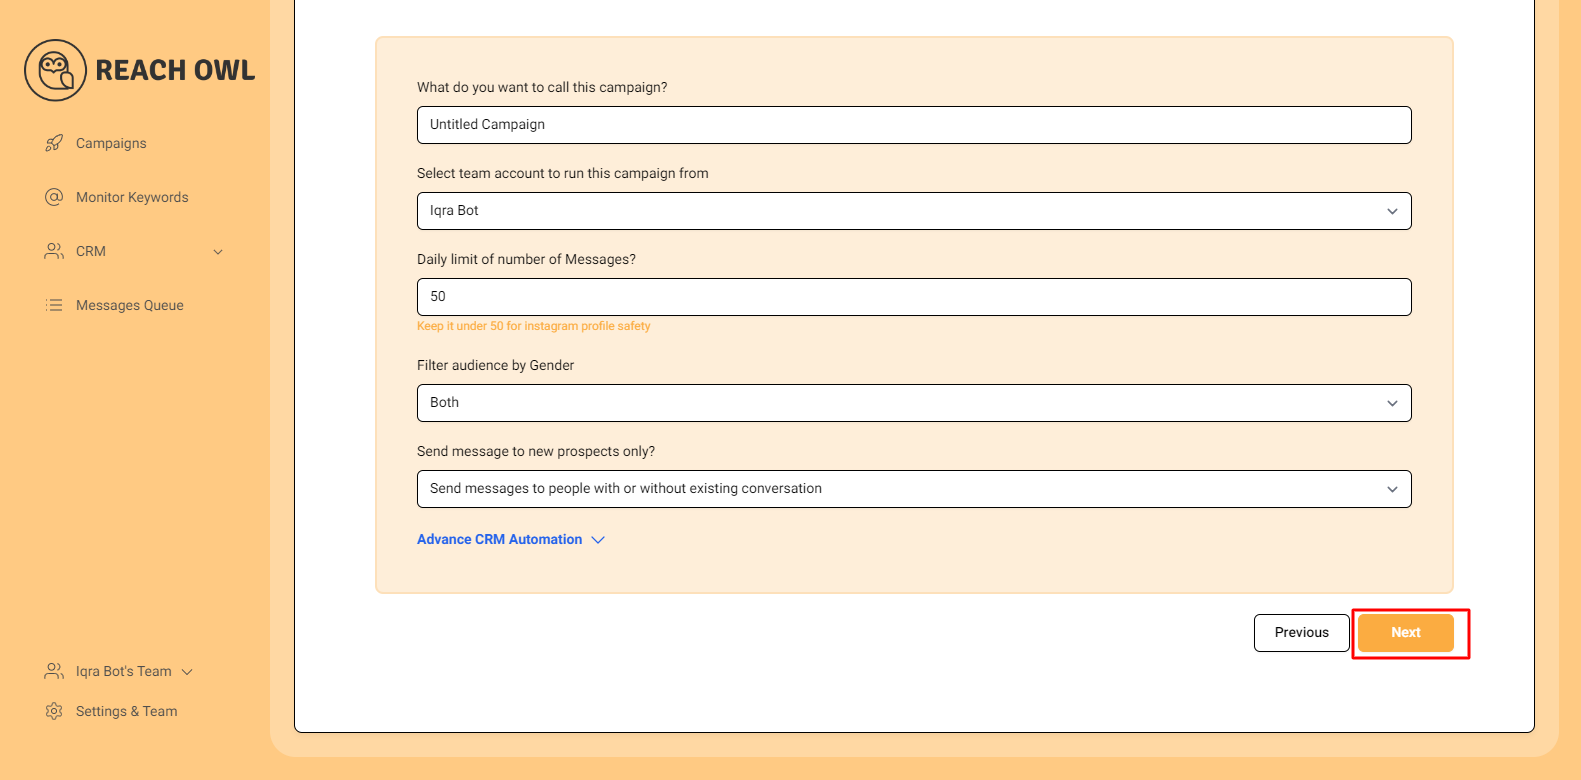
After filling out the options, click on next.
Step 12: Compose the Message

Now it’s time to craft your message sequence. Use the name variable, denoted by double curly braces ({{name}}), to personalize the messages with the recipient’s name.
Step 13: Add Multiple Messages

Click on “Add another message to the sequence” and create additional compelling messages that resonate with your target audience.
Step 14: Set Up the Messaging Sequence
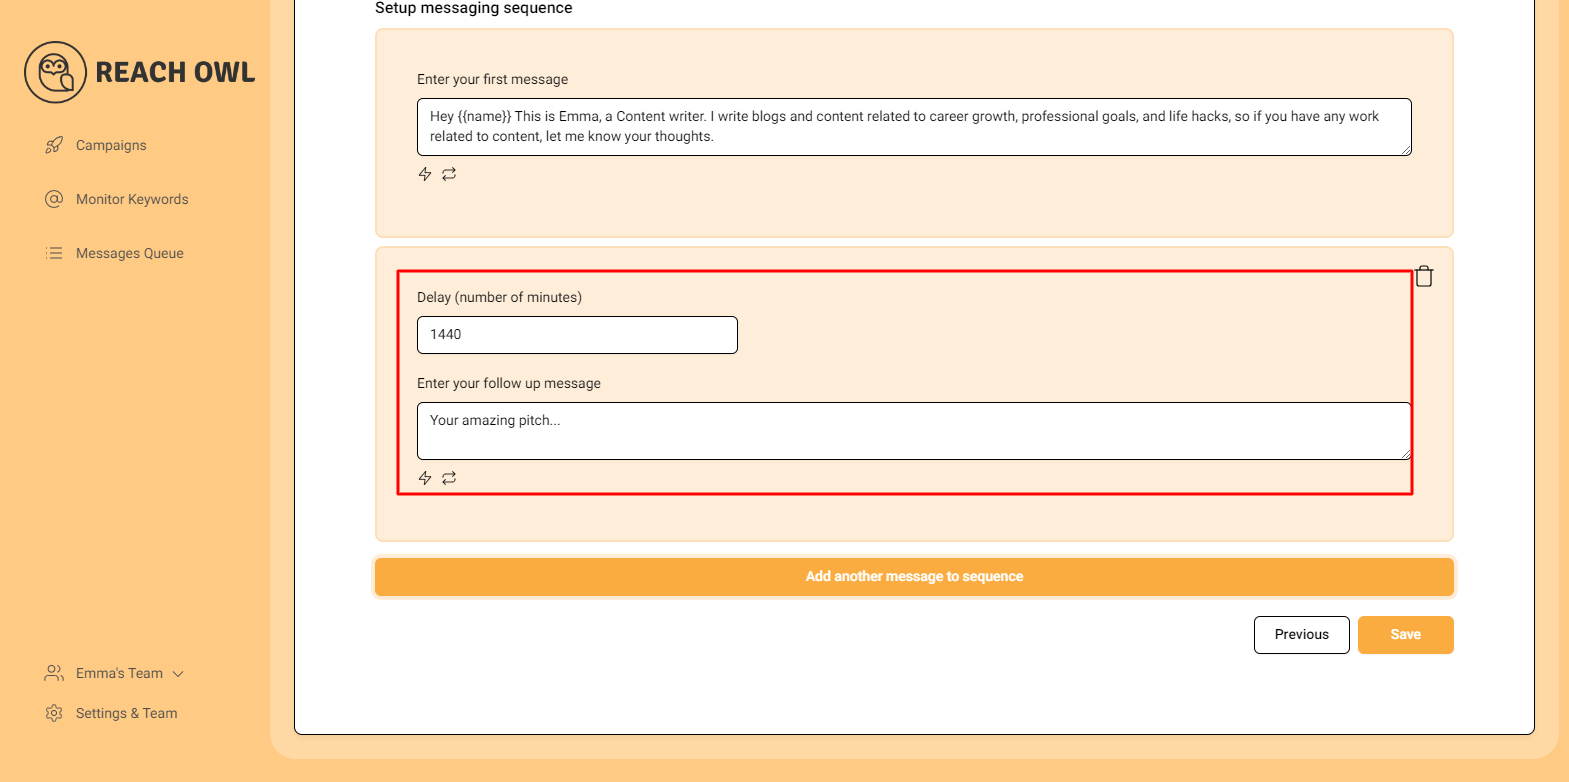
Craft a follow-up message and set a delay (e.g., a specific number of minutes) between each message in the sequence. This staggered approach helps ensure that your messages are not perceived as spam.
Once you’ve fine-tuned your messaging sequence, click “Save” to preserve your campaign settings.
Step 15: Start Your Campaign
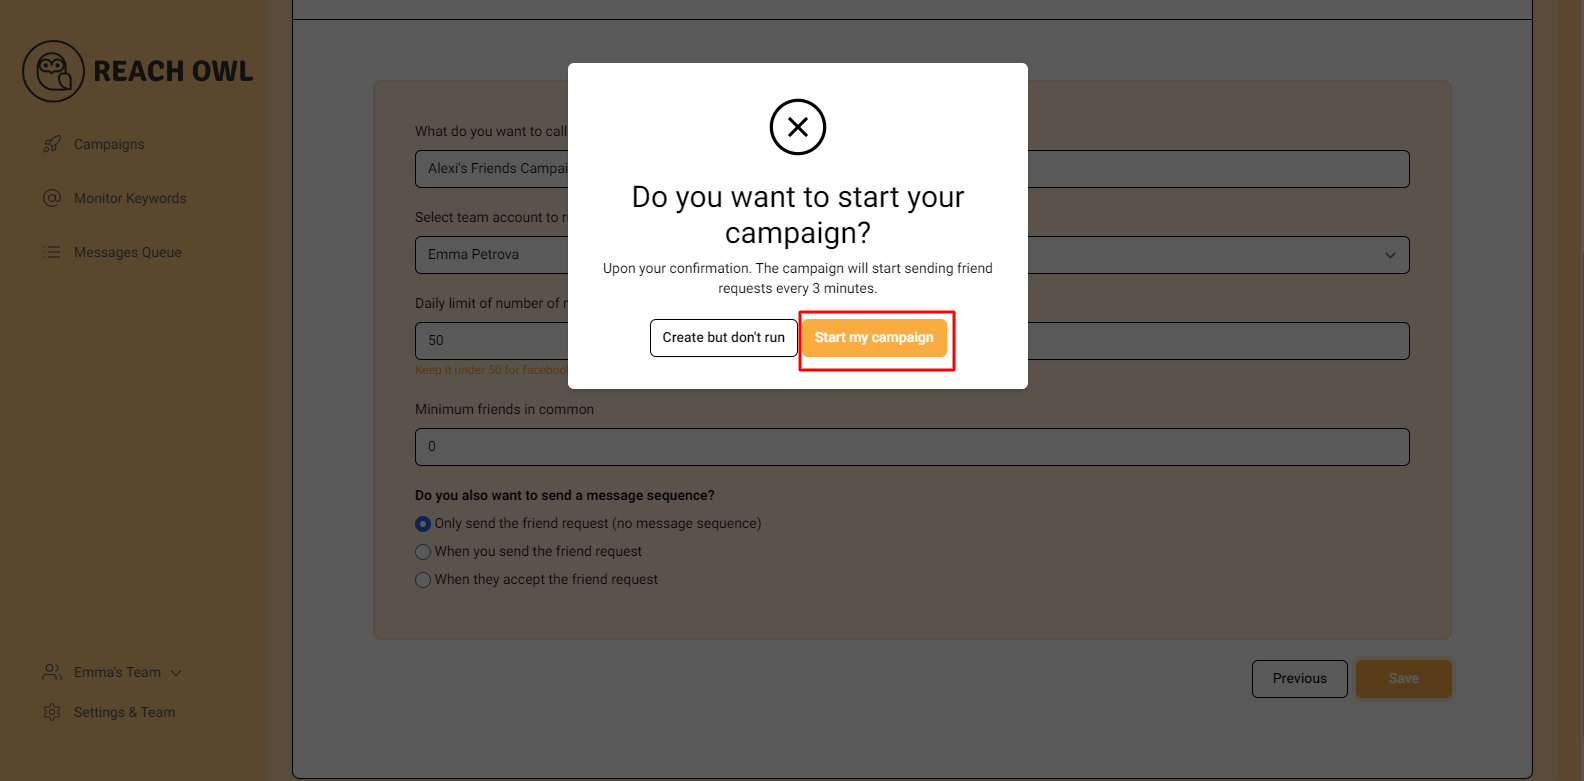
Finally, you’re ready to start your messaging campaign! Click on “Start My Campaign” to initiate the outreach process.
Step 16: Monitor and Manage
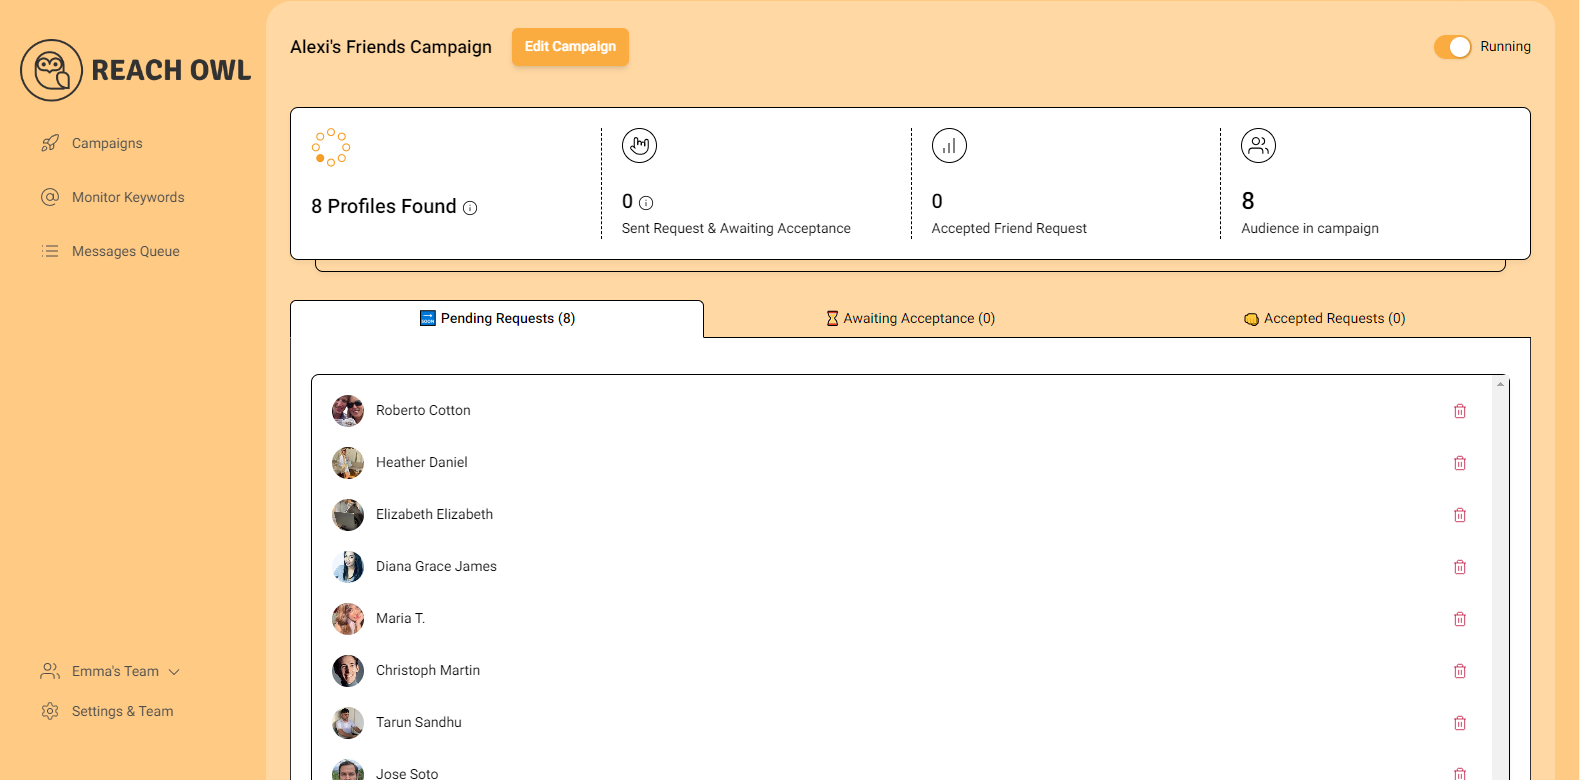
As your campaign progresses, ReachOwl will keep you updated on its status. You can view the audience followers who have been contacted and make adjustments as needed.
Conclusion
By following these steps, you can seamlessly upload Instagram profiles via CSV and set up a message sequence campaign using ReachOwl. This automation simplifies your outreach efforts, making it easier to engage with your target audience effectively.