
Do you want to simplify your Facebook networking efforts and automate friend requests? ReachOwl offers a convenient way to upload Facebook profiles via CSV and send automated friend requests.
In this blog, we’ll walk you through the steps to achieve this efficiently.
Step 1: Create a New Campaign
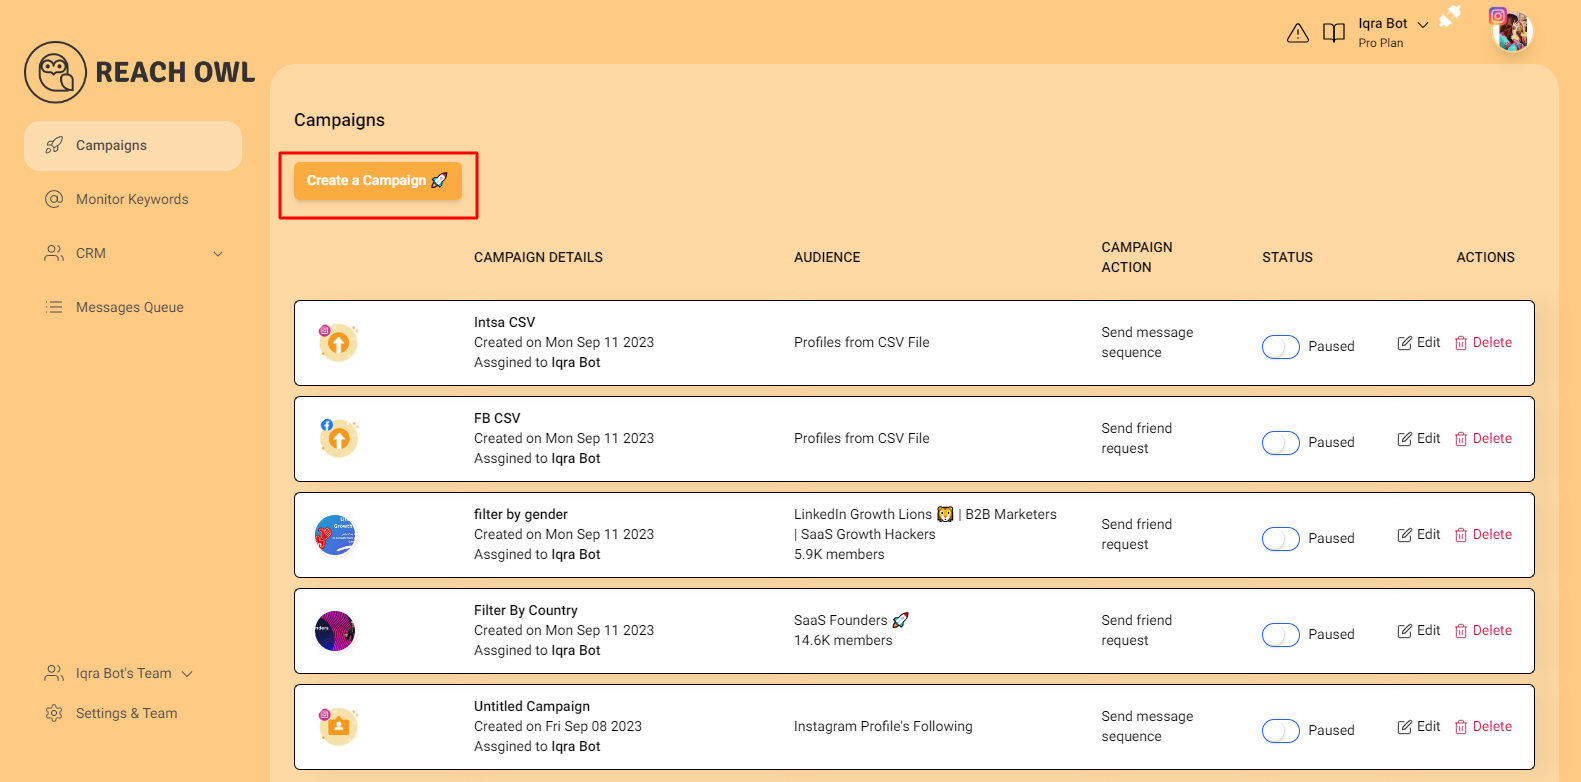
Start by logging into your ReachOwl account and select the “Create Campaign” option.
Step 2: Upload Your CSV File

Scroll down in the campaign creation options and click on “Upload CSV file.”
Step 3: Choose Your CSV File

Click on the “Choose File” option to select and upload your CSV file containing Facebook profile URLs. Ensure that your CSV file is formatted correctly to include the necessary profile information.
Note: If you don’t define a name column in the CSV, ReachOwl will automatically use the username from everyone’s Facebook URL. So you need to either put the full name in a column labeled ‘name’, or you can separate the first name and last name.
Step 4: Proceed to the Next Step

After successfully uploading the CSV file, click on “Next” to continue.
Step 3: Select Friend Request Option

Choose your friend request option. This will enable you to send automated friend requests to the members of your selected Facebook group.
Step 4: Name your Campaign
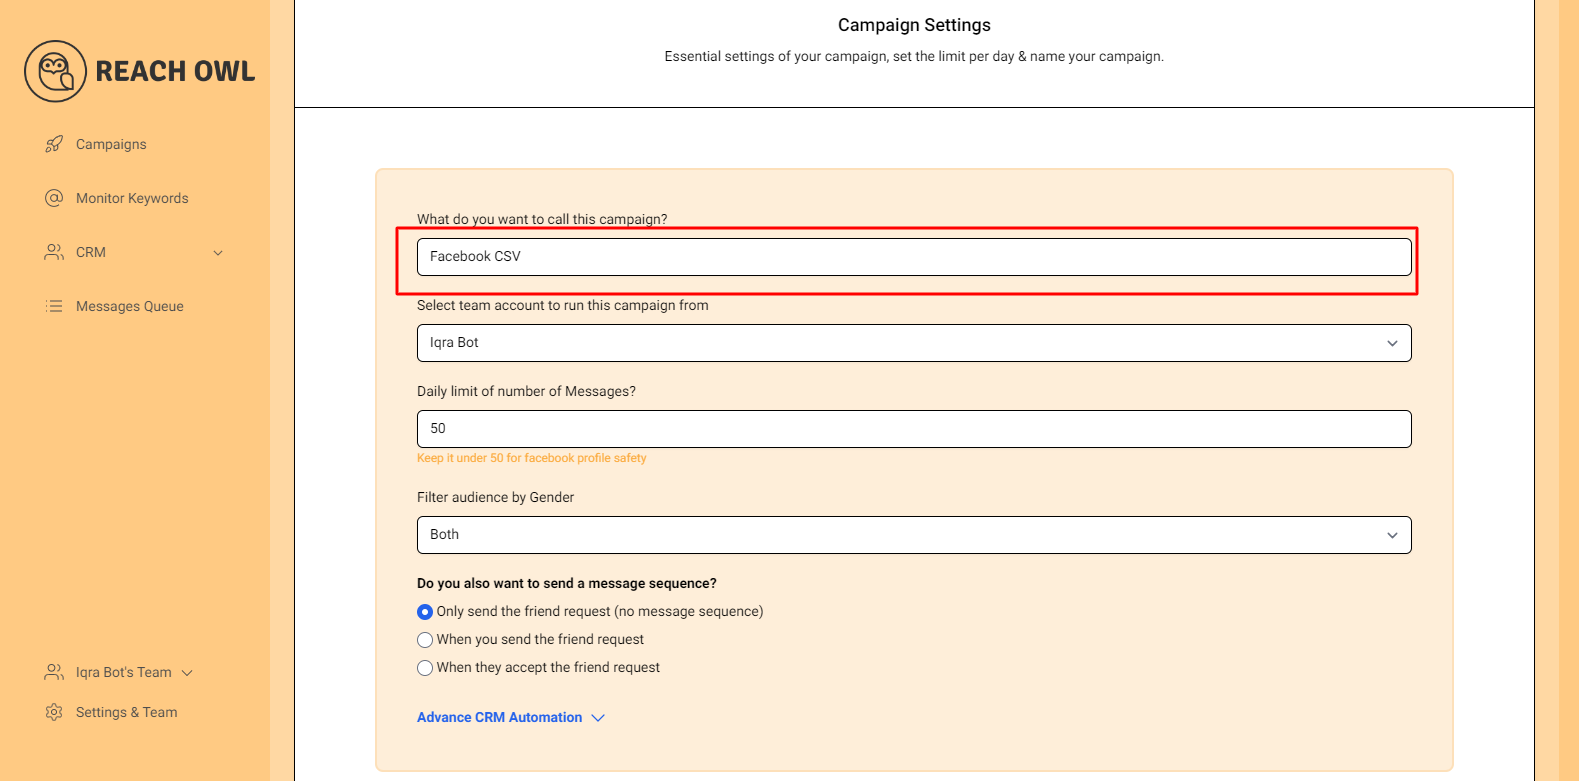
Create a descriptive name for your campaign. This name will help you easily identify the campaign within ReachOwl.
Step 5: Select the Account to Run Your Campaign
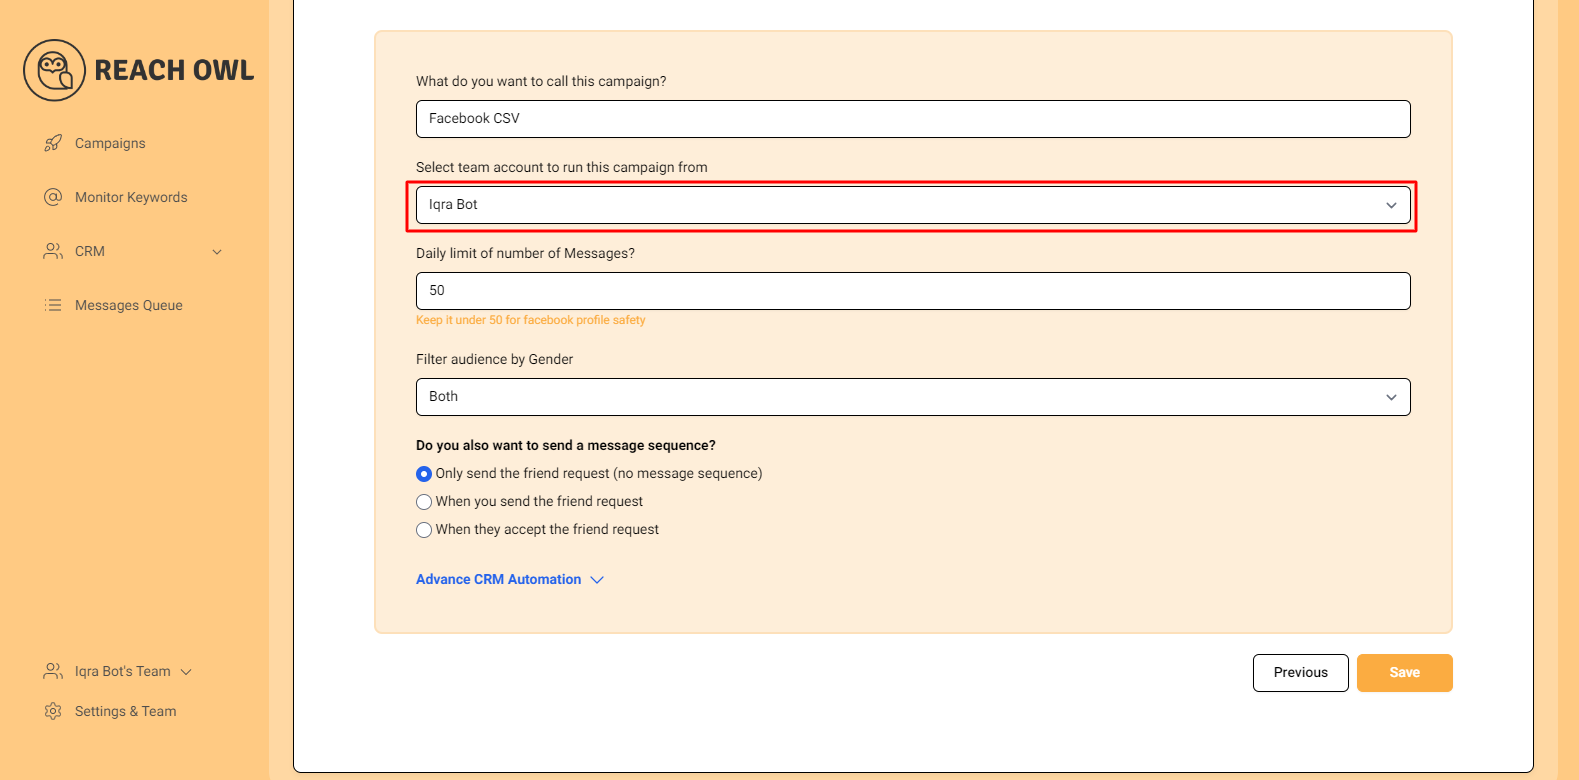
Choose the account from which you want to run the request campaign.
Step 6: Set Up a Daily Limit on the Number of Request

If you want to control the number of requests sent per day, you can set a daily limit.
Step 7: Filter by Gender
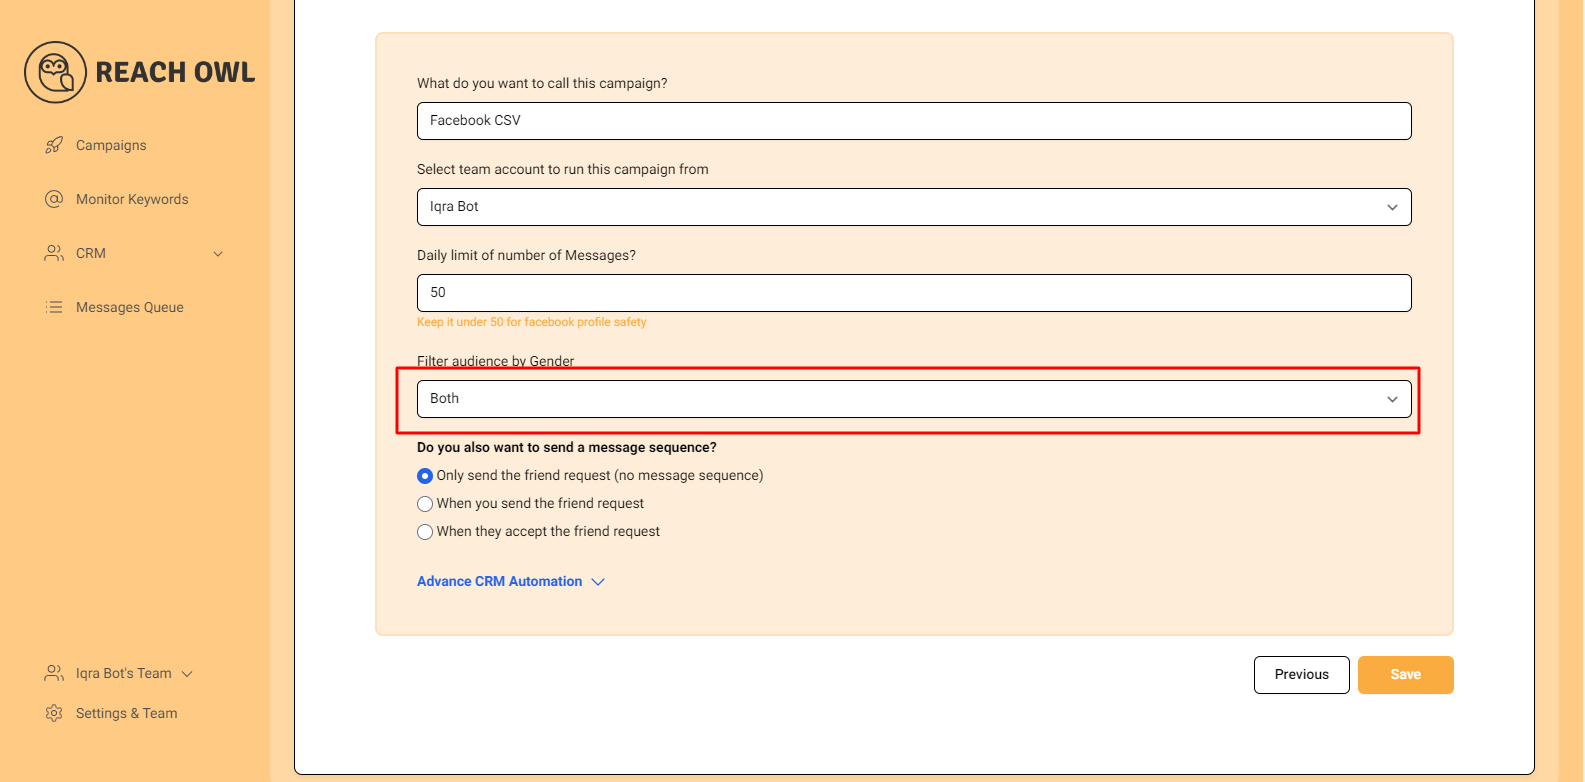
In this step, you can specify the gender you want to target. ReachOwl allows you to filter users by gender, ensuring that your friend requests are directed at your desired demographic.
Step 8: Opt for Friend Request Only
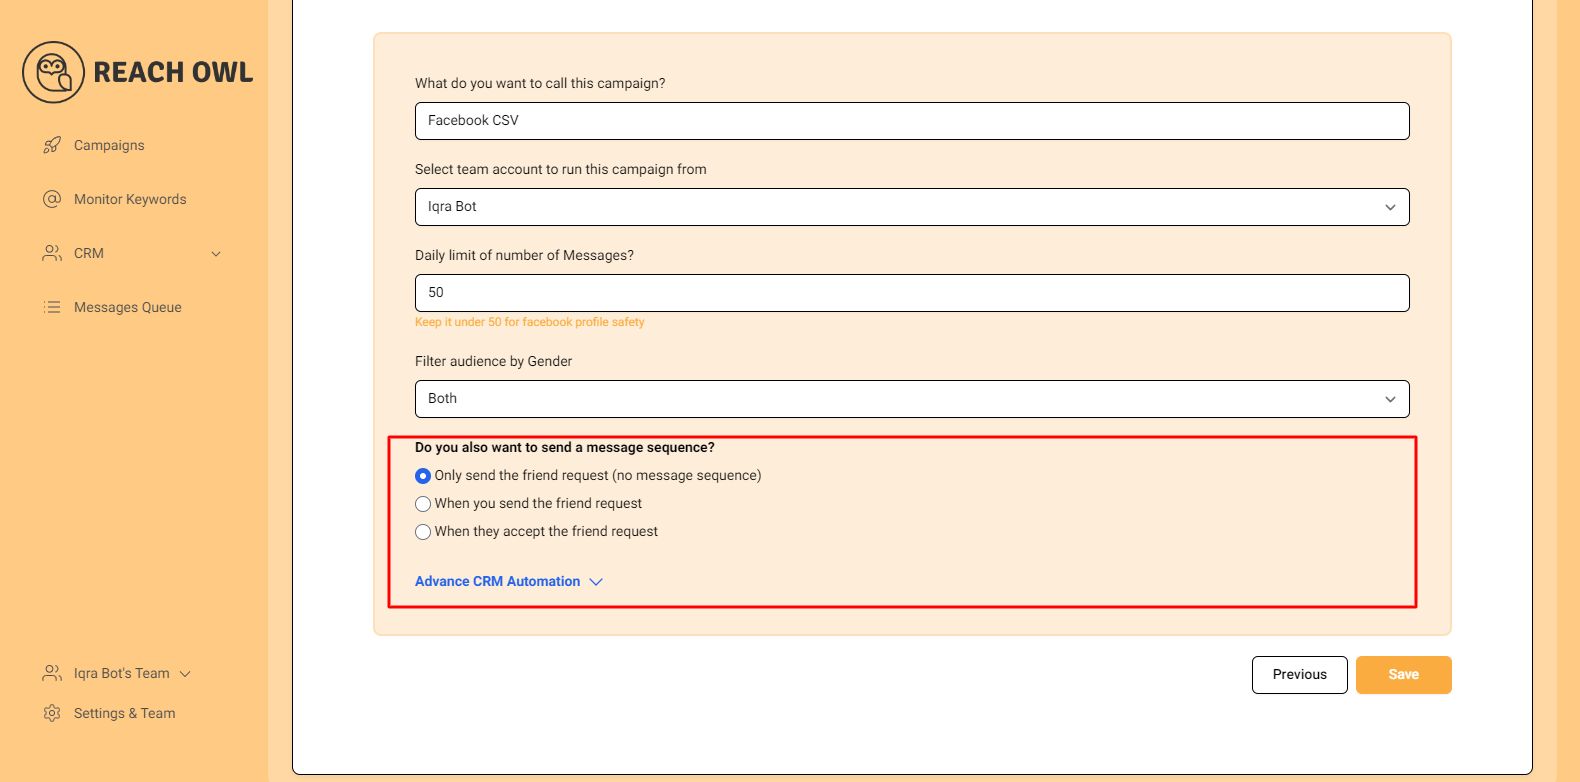
For this specific campaign, click on the option “Only Send the Friend Request (No Message Sequence).”
Step 9: Save Your Campaign
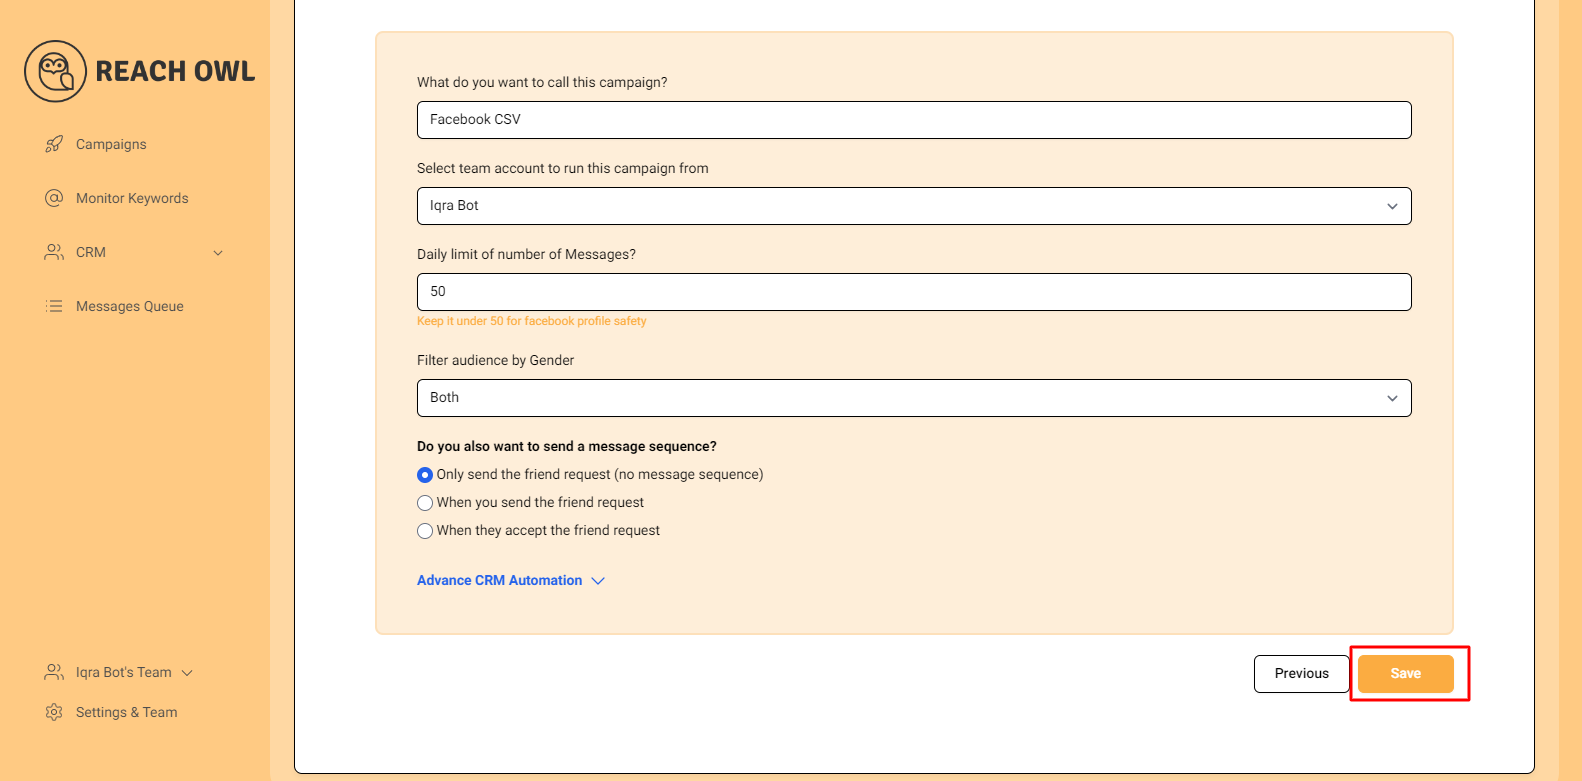
Once you’ve configured all the options, click on the “Save” button.
Step 10: Start Your Campaign
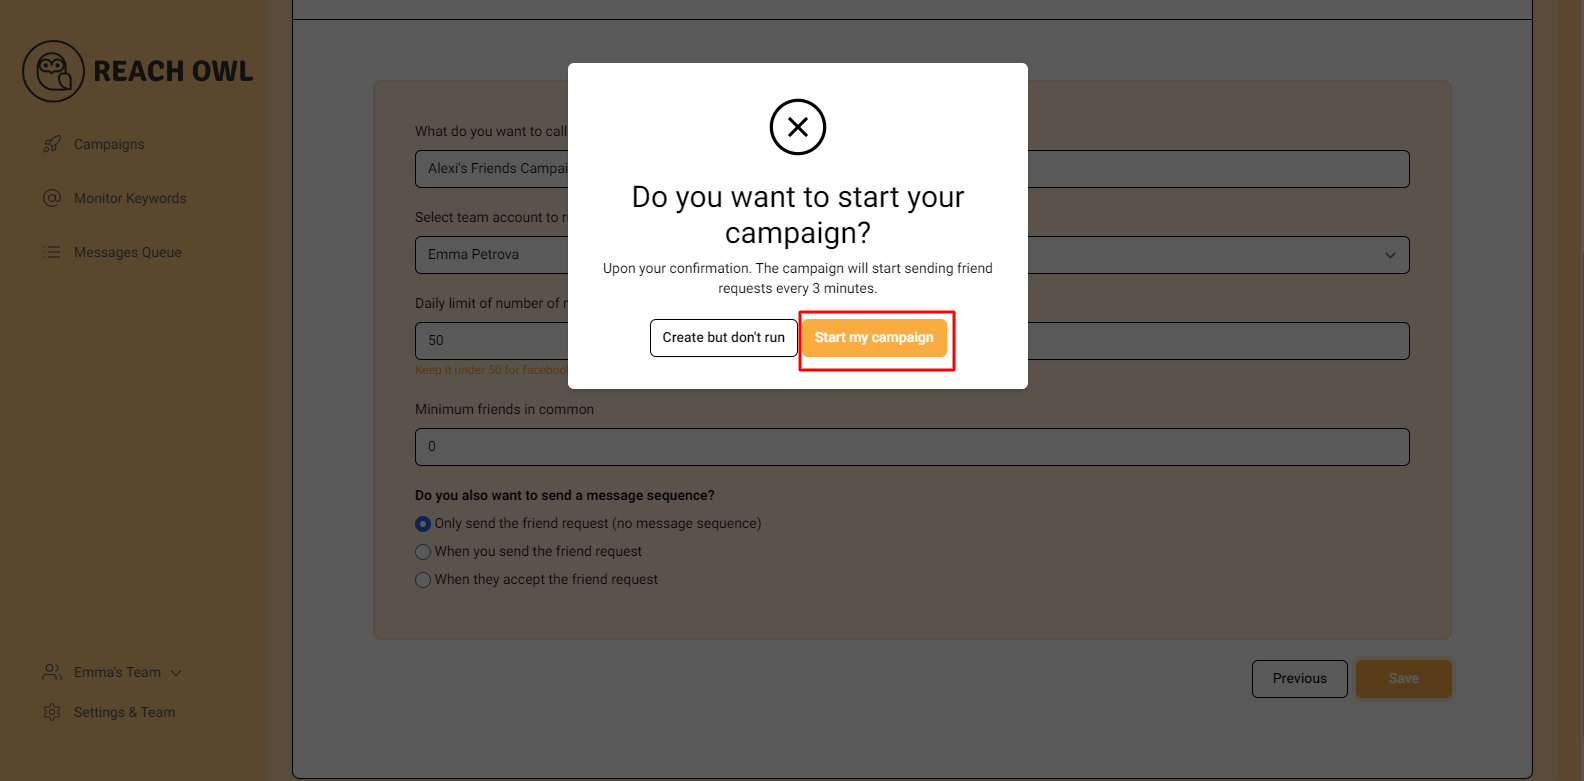
Click on “Start My Campaign” to initiate the outreach process.
Your campaign is now ready to be launched!
Step 11: Monitor the Progress
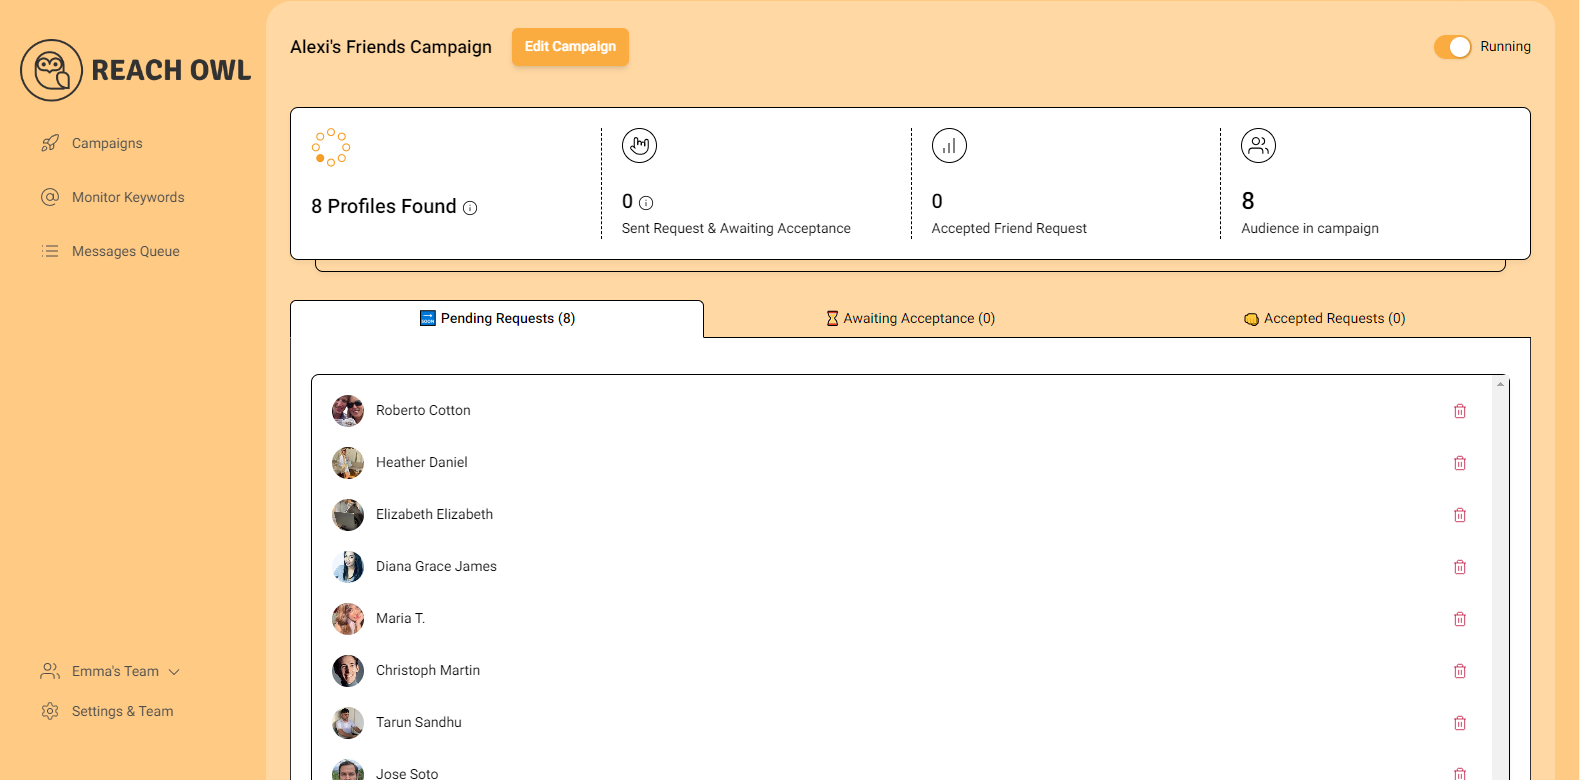
After starting the campaign, ReachOwl will begin extracting friends from the specified profile and automatically sending out friend requests. You can monitor the progress within the ReachOwl interface.
Step 12: Review the Results
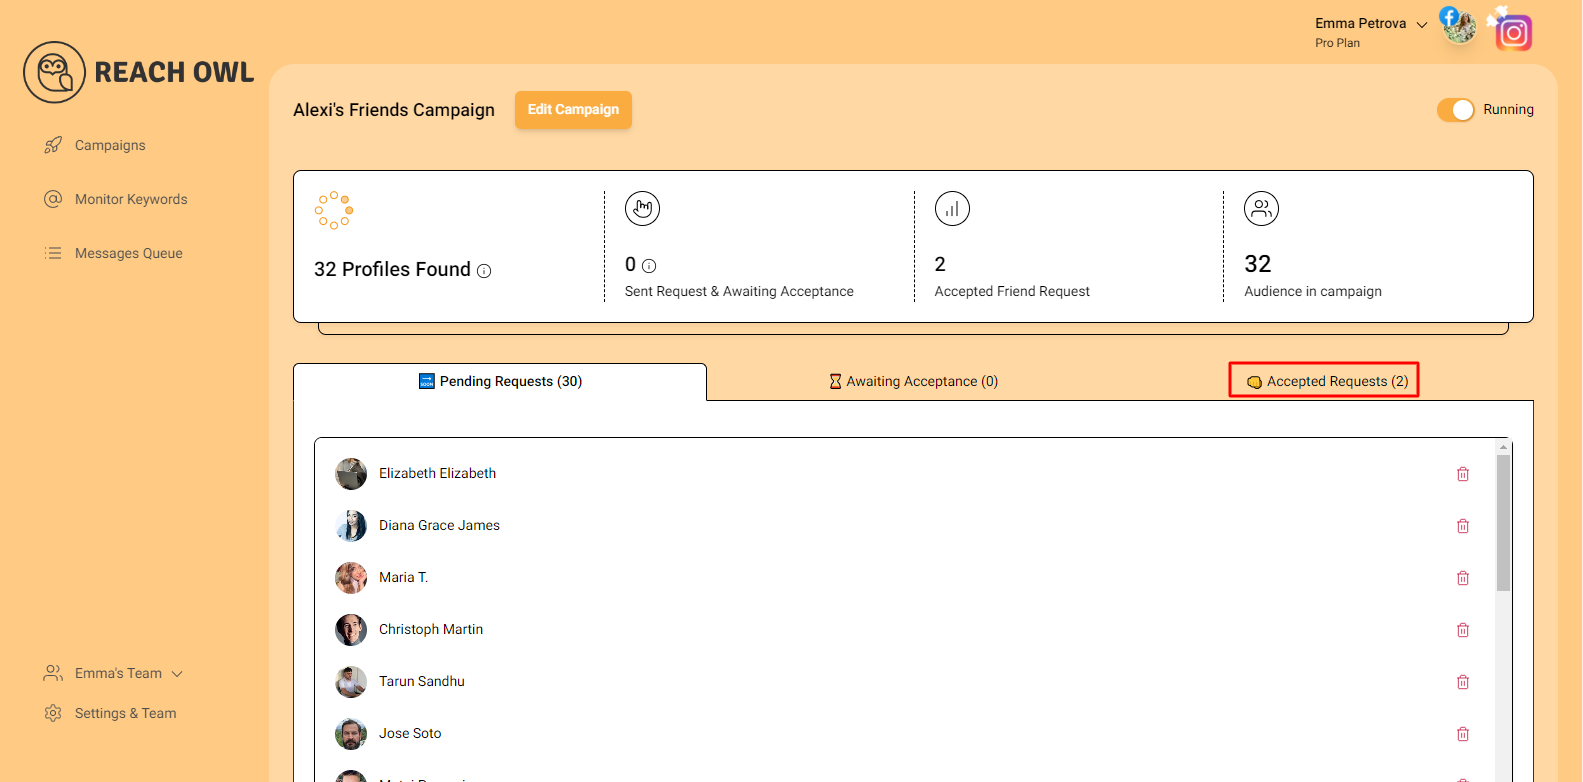
After a while, refresh the page, and you’ll notice that ReachOwl has already sent friend requests to some users. As users accept your friend requests, you’ll see the progress of your campaign.
Conclusion
By following these steps, you can efficiently upload Facebook profiles via CSV and automate friend requests using ReachOwl. This streamlined approach simplifies your Facebook networking efforts and helps you expand your connections with ease.