Messaging campaigns have proven to be a highly effective way to engage with prospects and drive conversions.
In this blog, we will walk you through the step-by-step process of creating a successful direct messaging campaign using ReachOwl, a tool that simplify the process and maximizes your outreach efforts.
Step 1: Access Your Facebook Groups

click on “Facebook Group Members,” and you’ll see that ReachOwl already accesses all the Facebook groups linked to your account.
Step 2: Select the Target Facebook group

From the list of your Facebook groups, choose the one you want to target for your messaging campaign.
Step 3: Choose Your Messaging Option

Step 4: Name the Campaign
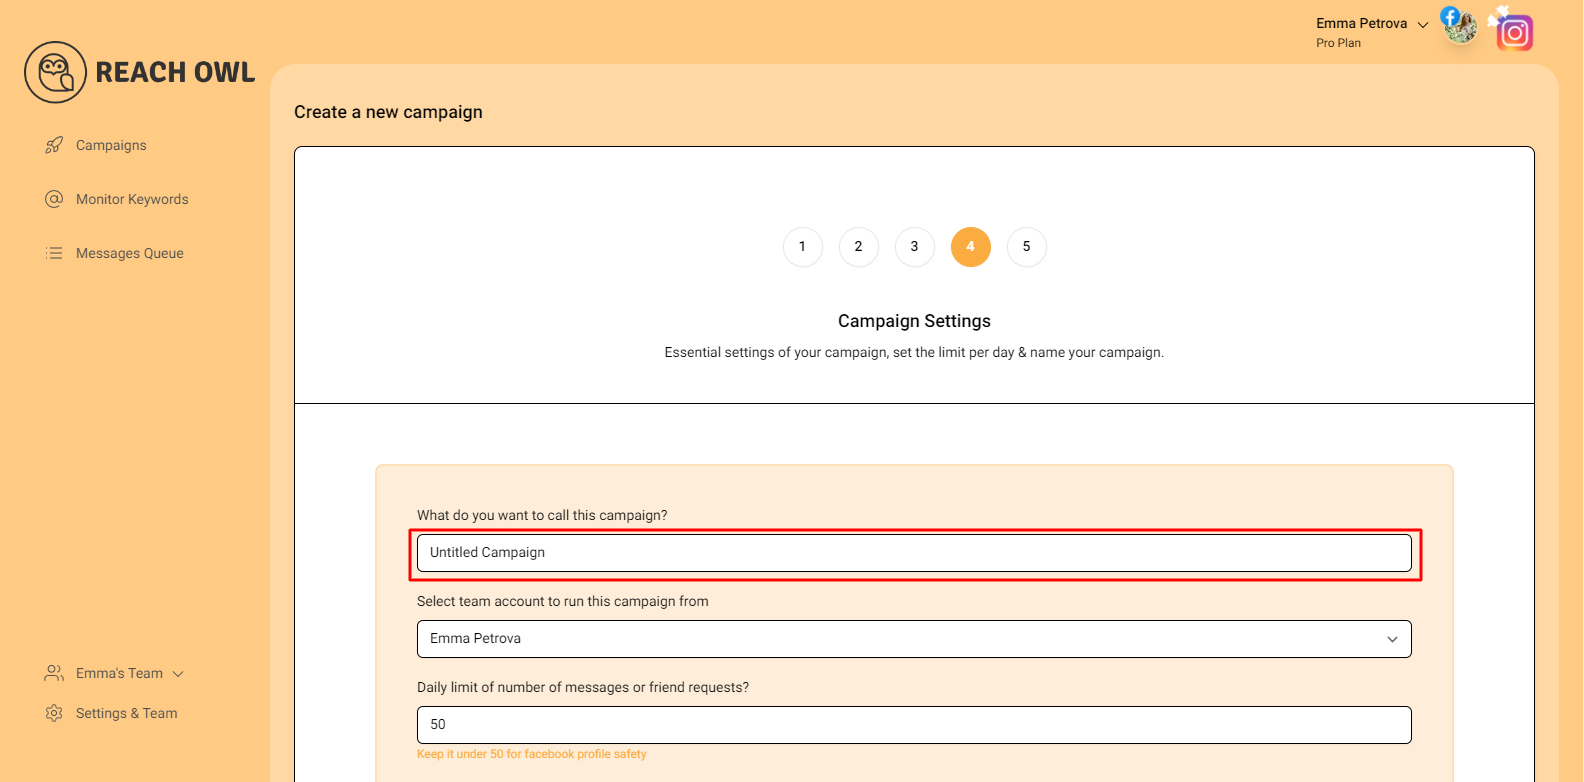
Choose a descriptive name for your campaign that will help you identify it easily in the future.
Step 5: Select the Account to Run Your Campaign

Choose the account from which you want to run the message campaign.
Step 6: Set Up a Daily Limit on the Number of Messages

If you want to control the number of messages sent per day, you can set a daily limit.
Step 7: Define Your Target Audience

Determine the keywords you want to target in the bio to identify potential recipients. For example, CEO, Founder, Entrepreneur, Business Owner, etc.
Step 8: Exclude Audiences with Certain Words
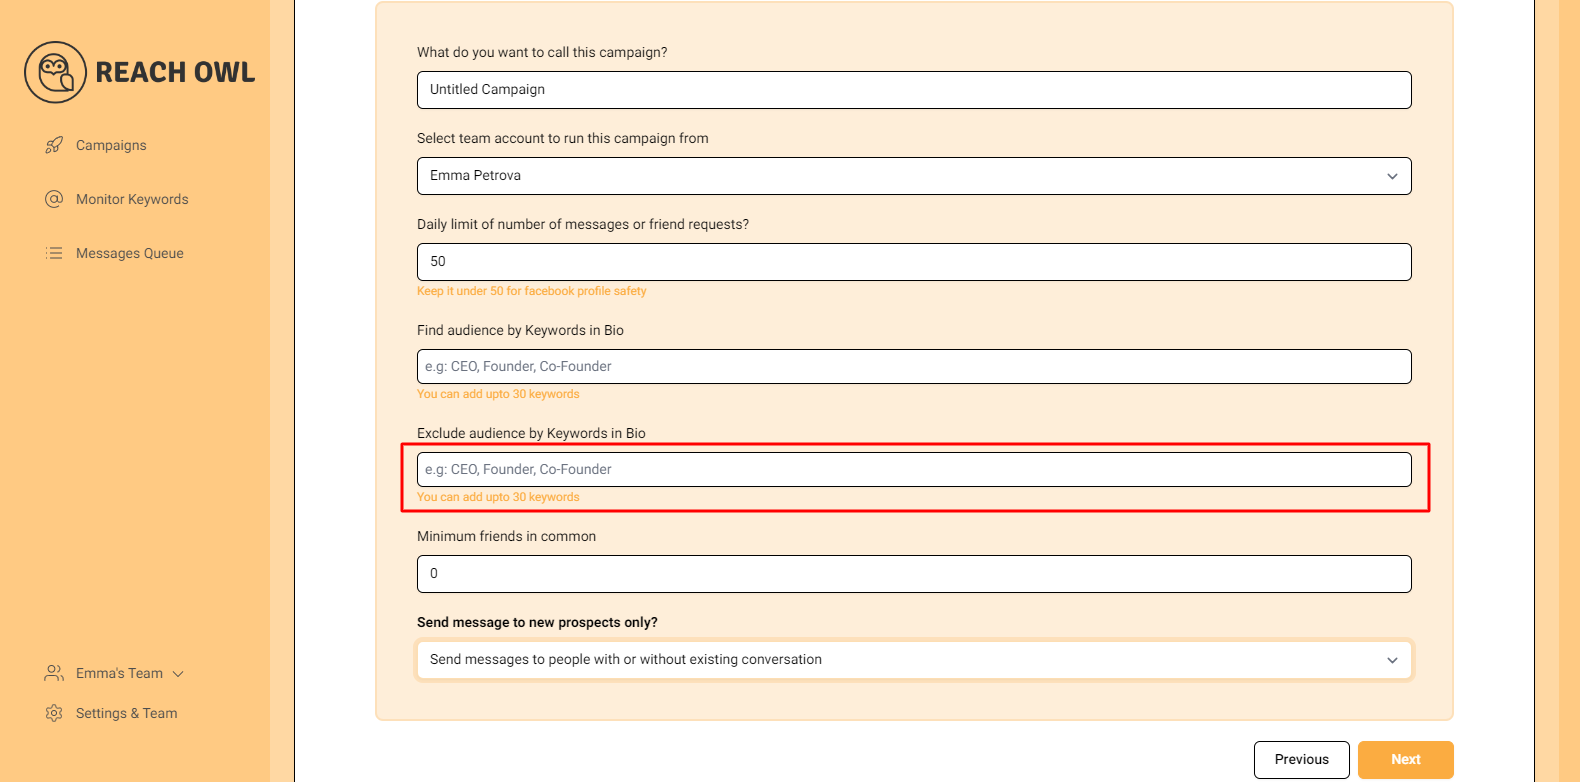
Identify the keywords that indicate you want to exclude certain groups from the campaign. For instance, a freelancer, student, intern, etc.
Step 9: Set the Minimum Number of Friends in Common
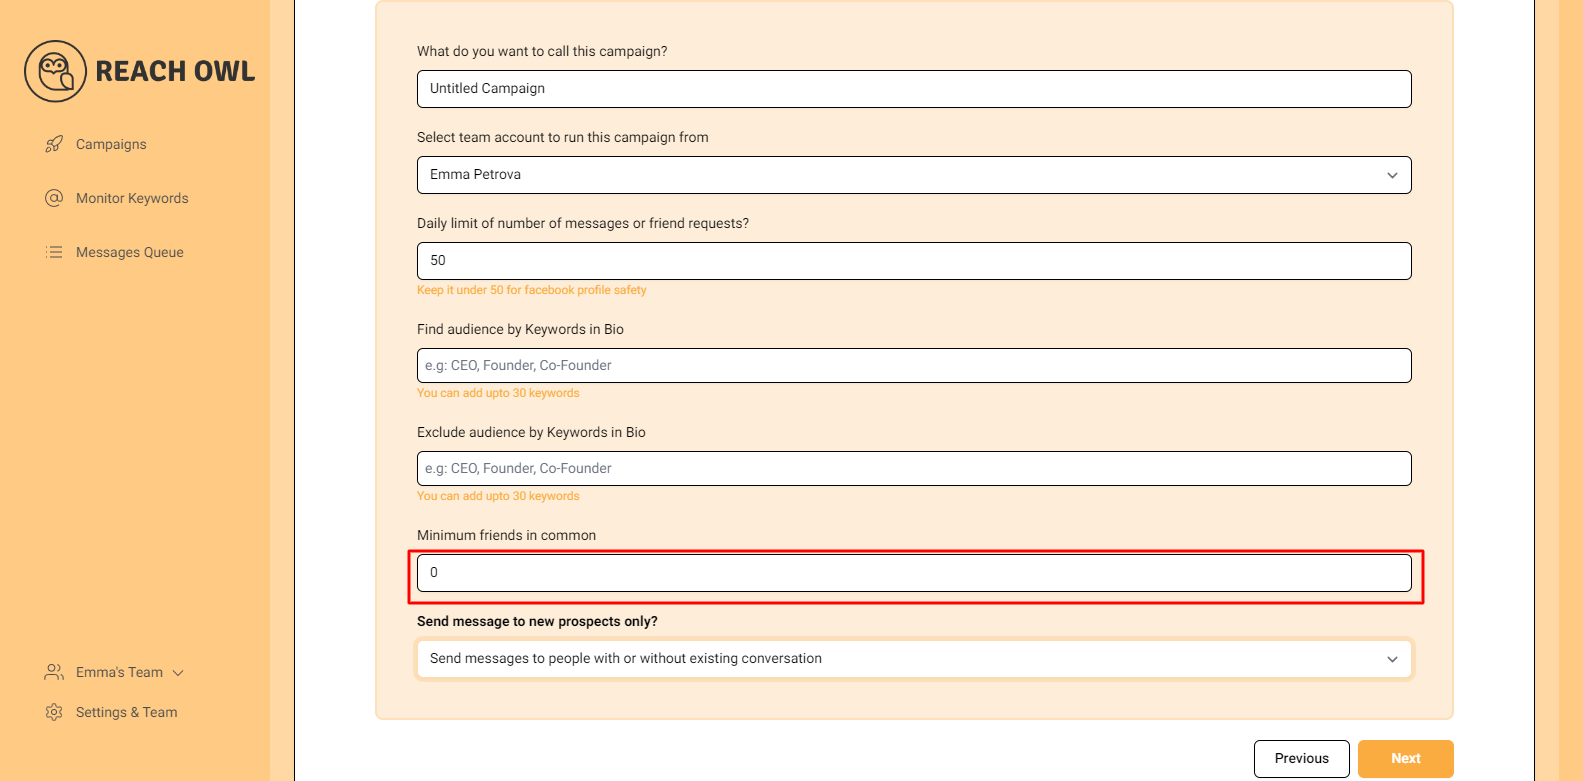
You can choose to establish a minimum number of friends in common that are required between you and then target prospects to send the messaging campaign.
Step 10: Send messages to new prospects only?

You can choose whether you want to send the campaigns to new people or to the people you already have conventions with.
Step 11: Compose the Message

Craft your messages to engage with your audience effectively. Use the name variable, denoted by double curly braces, to personalise the messages with the recipient’s name.
Step 12: Add Multiple Messages

Click on “Add another message to the sequence” and create additional compelling messages that resonate with your target audience.
Step 13: Set Up the Messaging Sequence
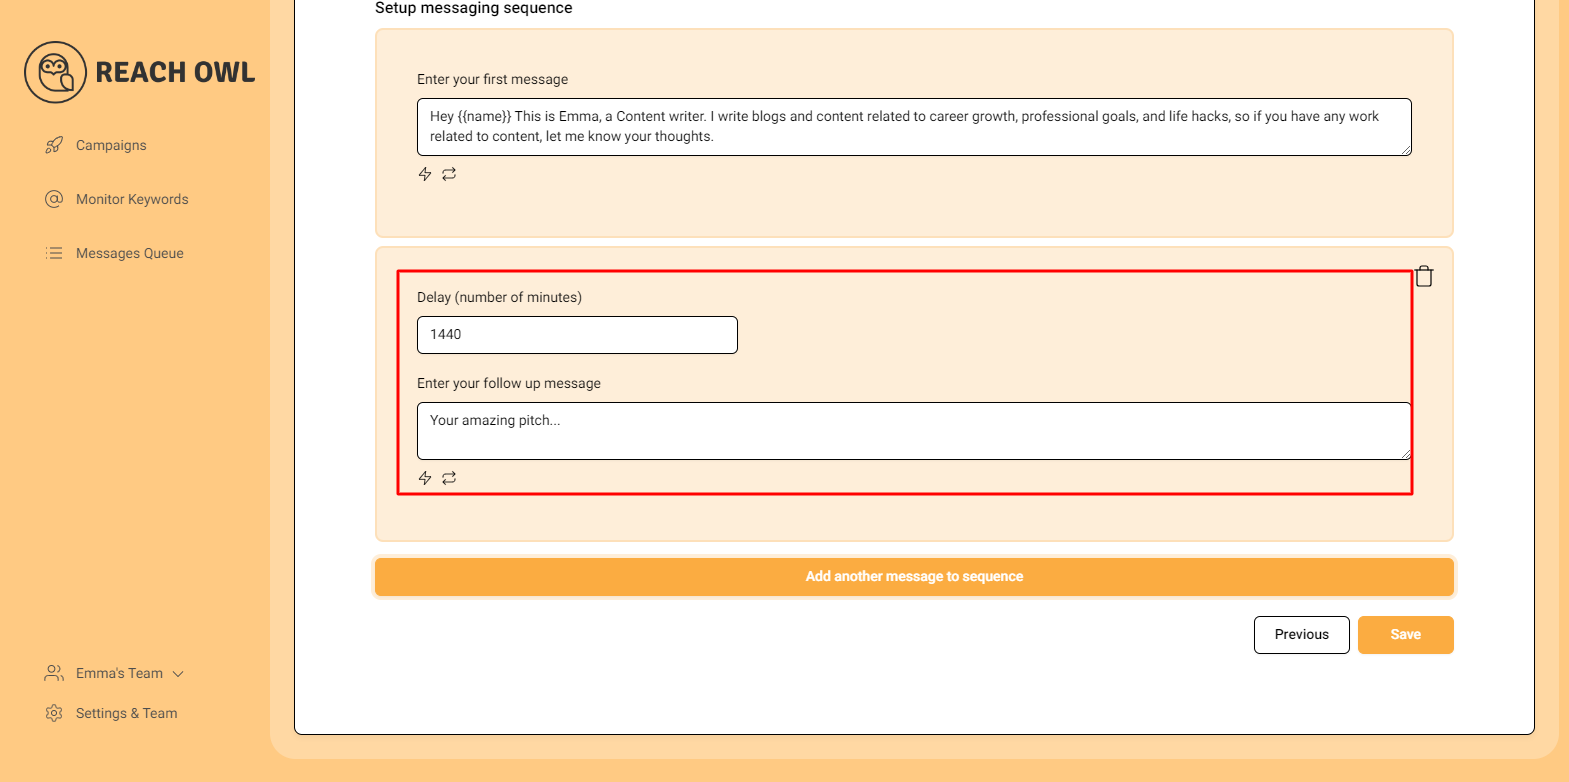
Craft a follow-up message and set a delay (e.g., a specific number of minutes) between each message in the sequence. This staggered approach helps ensure that your messages are not perceived as spam.
Step 14: Start Your Campaign
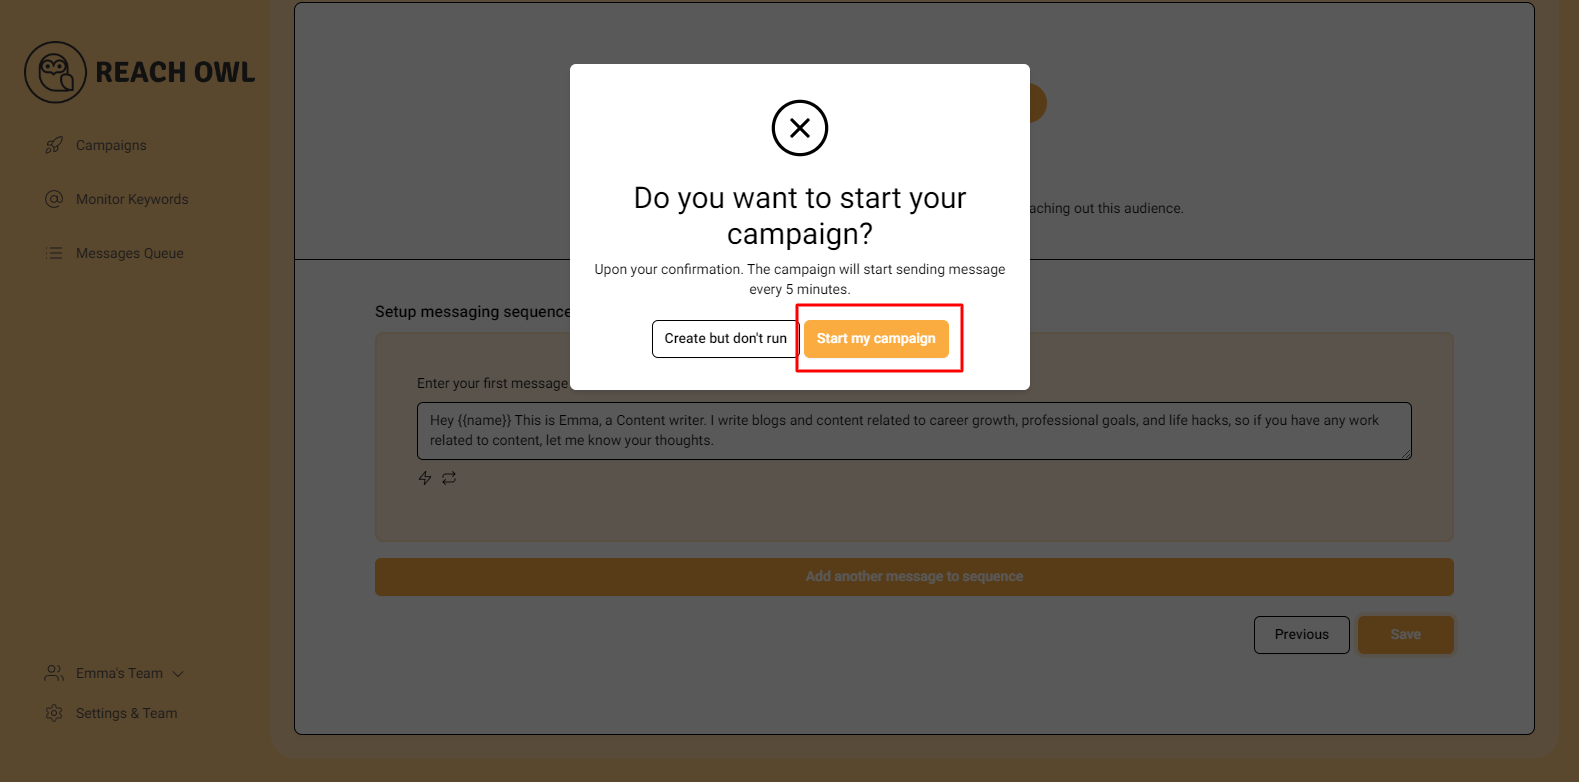
Before launching your campaign, you have the option to create but don’t run it yet.
Finally, you’re ready to start your messaging campaign! Click on “Start My Campaign” to initiate the outreach process.
Step 15: Monitor and Manage

As your campaign progresses, ReachOwl will keep you updated on its status. You can view the audience members who have been contacted and make adjustments as needed.
Conclusion
Messaging campaigns with ReachOwl offer a powerful way to connect with your target audience and drive meaningful interactions. Remember to keep your messaging personalized, engaging, and respectful of your audience’s time.
With ReachOwl’s automation and targeting capabilities, you can unlock the full potential of your outreach strategy and achieve impressive results.
So why wait? Start crafting your messaging campaign today and take your business to new heights of success.
Happy messaging!