ReachOwl, a powerful tool that automates direct messages and friend requests on Facebook, you can optimize your outreach efforts and achieve impressive results.
In this tutorial, we will guide you through the simple steps to get started with ReachOwl Account and unlock its potential for your business.
Steps to get started with ReachOwl Account
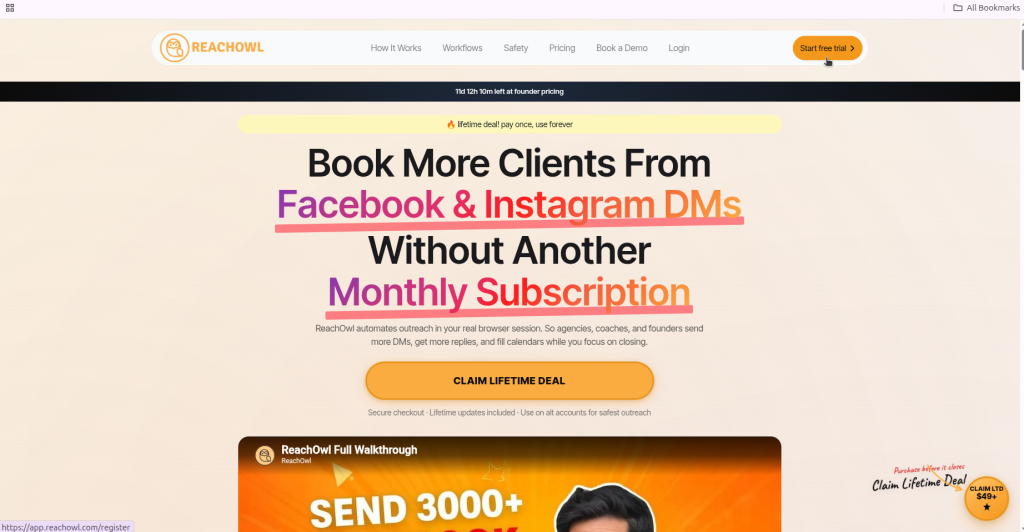
Step 1: Go to the ReachOwl Website and Click on Register
To begin your journey with ReachOwl, head to the official ReachOwl website and click on the “Register” button.
Step 2: Create Your Account and Enter Your name
Once you click on “Register,” you’ll be prompted to create your ReachOwl account. Enter your name in the designated field.
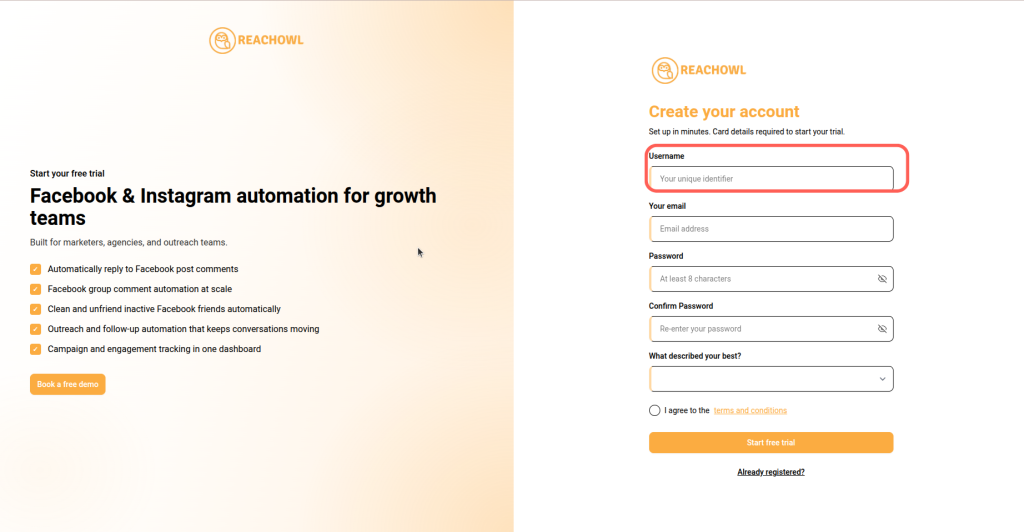
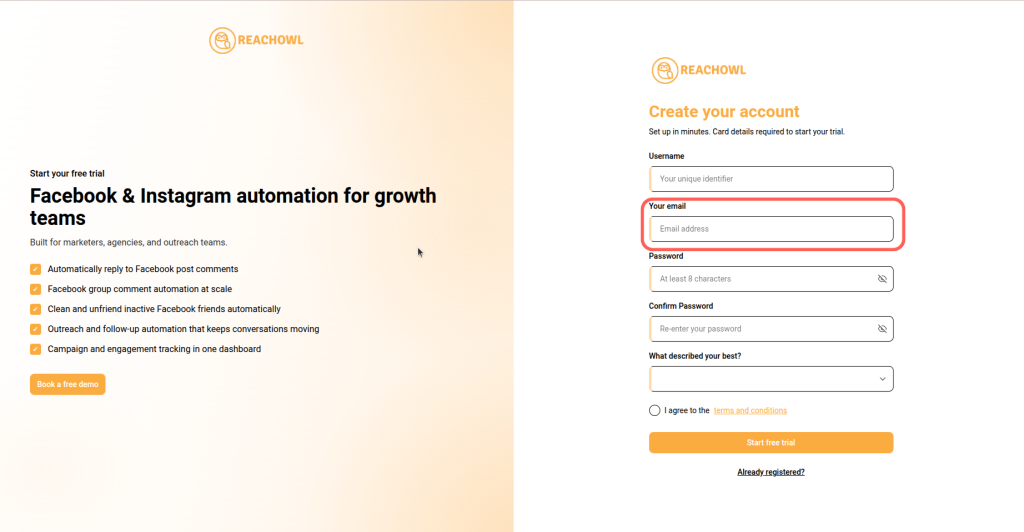
Step 3: Enter Your Email ID
Provide your email address to associate it with your ReachOwl account. This email will be used for important communications and account-related updates.
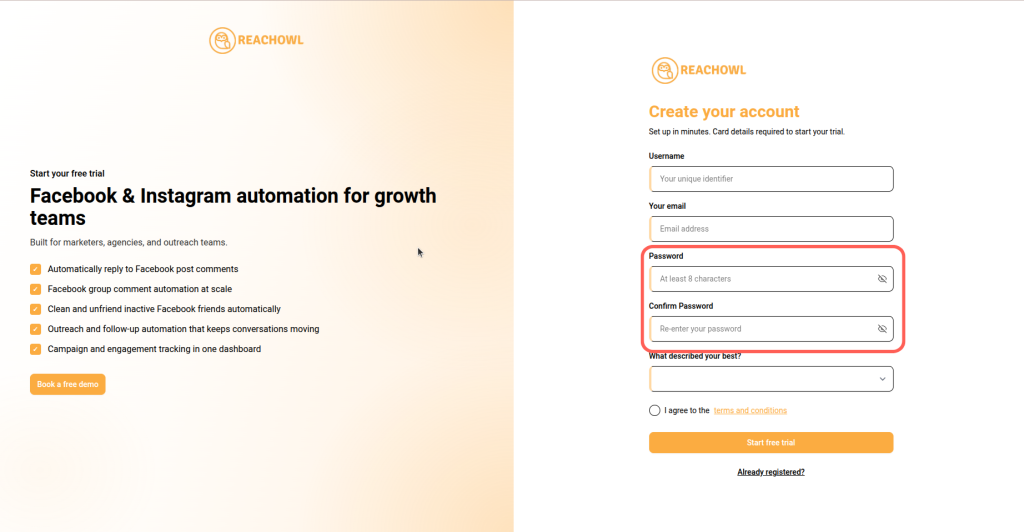
Step 4: Set Your Password and Confirm it
Choose a strong password for your ReachOwl account and re-enter it to confirm. Make sure it meets the security requirements to protect your account.
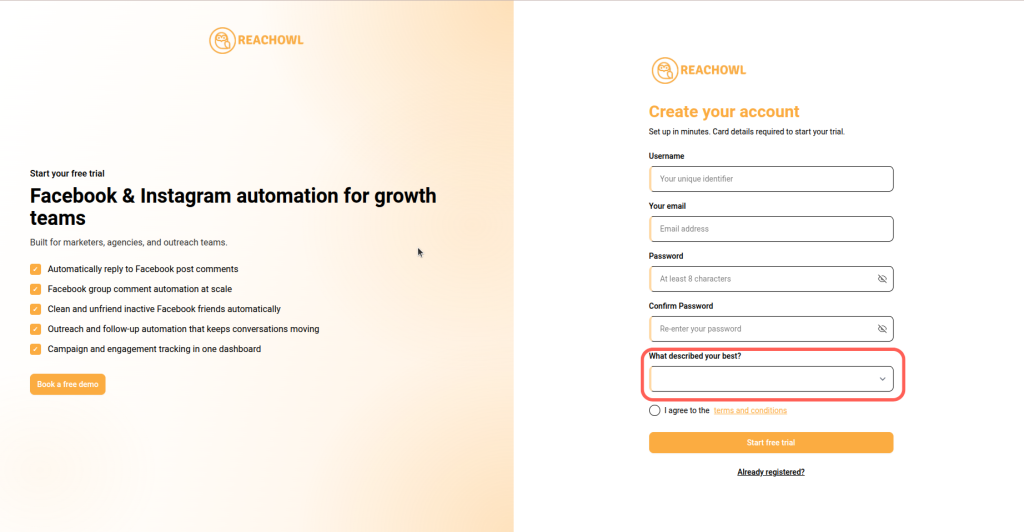
Step 5: Choose Your Description
Select the description that best fits your role or business type. ReachOwl offers options such as Coach, Agency, Freelancer, or Other. This helps customize the platform according to your needs.
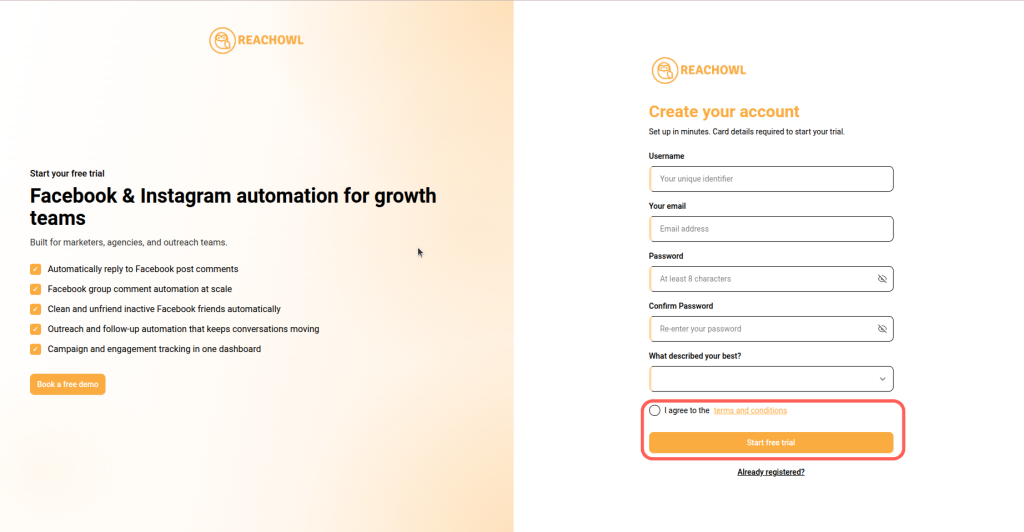
Step 6: Click on Register to Access Your account
Once you’ve filled in all the necessary information, click on the “Register” button to create your ReachOwl account and gain access to its features.
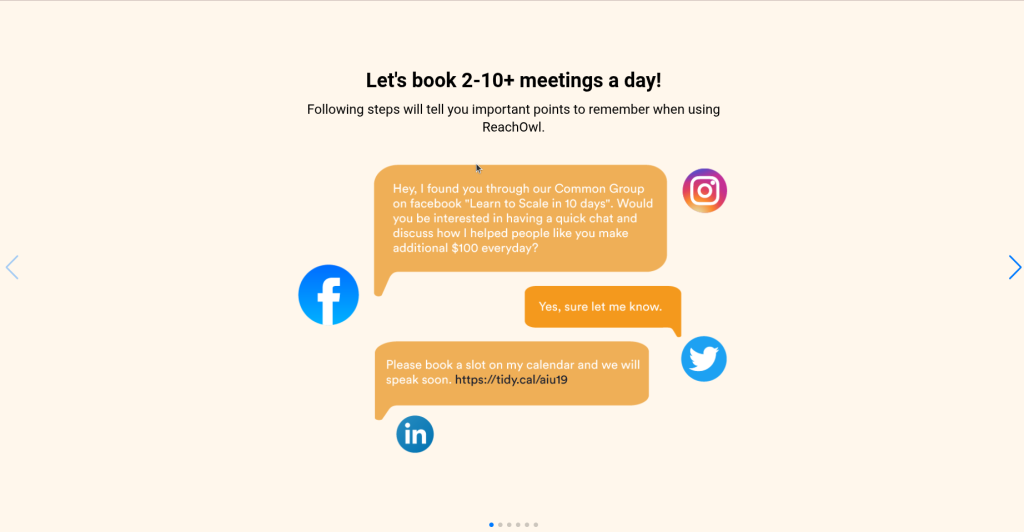
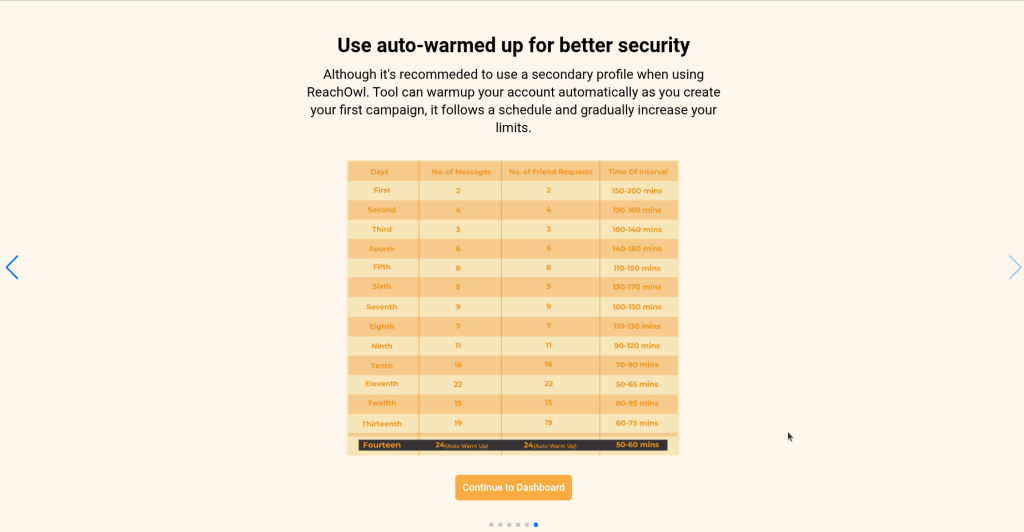
Step 7: Swipe Through the Slides
After registering, you might be presented with informative slides introducing you to ReachOwl’s features and functionality. Swipe through these slides to familiarize yourself with the tool.
Step 8: Click on Continue to Dashboard
After reviewing the introductory slides, click the “Continue to Dashboard” button to access your ReachOwl dashboard and begin setting up your account
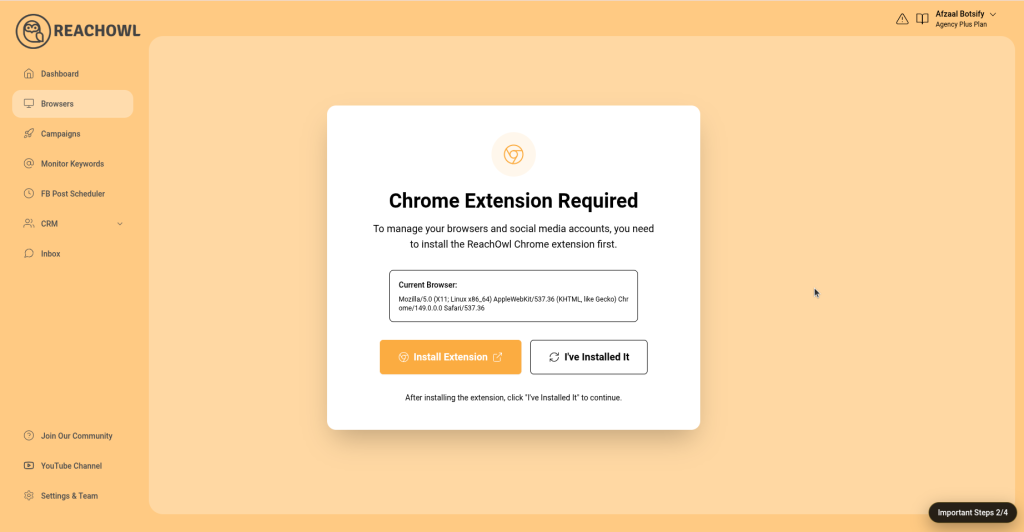
Step 9: Open the Browsers Page and Install the Extension
From the left sidebar, click “Browsers”. If the ReachOwl Chrome extension is not installed, you will see the “Chrome Extension Required” screen. Click “Install Extension” and follow the installation instructions. Once installed, click “I’ve Installed It” to continue.
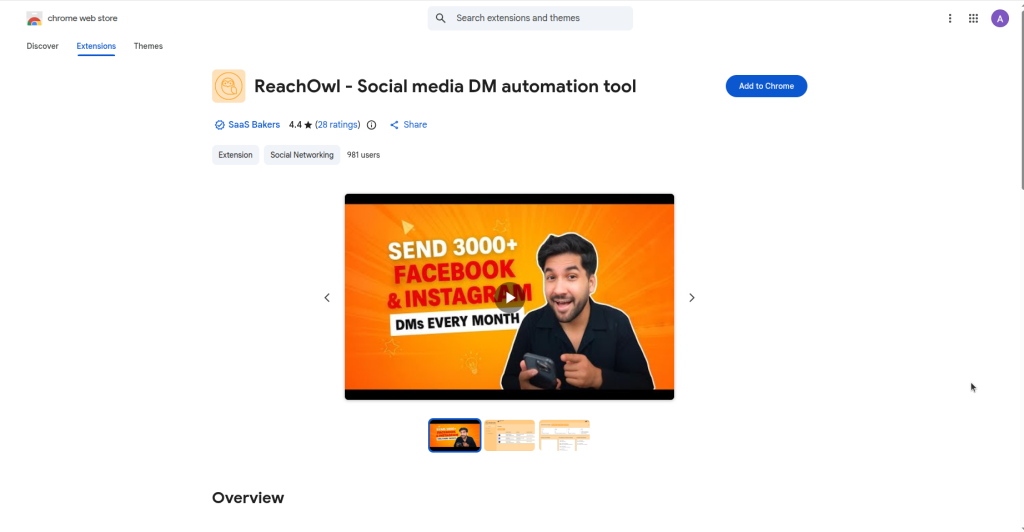
Step 9: Add the ReachOwl Chrome Extension
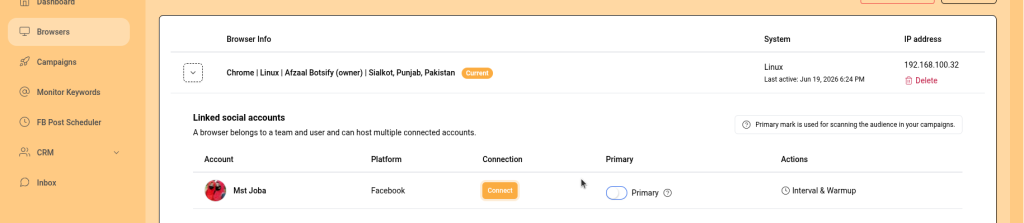
Step 10: Manage Your Social Accounts
After the extension is installed, the Browsers page will display your connected social media accounts. From here, you can connect, manage, and monitor your social accounts for use with ReachOwl campaigns and automations.
Step 11: Start Using ReachOwl
Once your social account is connected, you’re ready to create campaigns, automate outreach, monitor keywords, and manage conversations directly from your ReachOwl dashboard.
Conclusion
ReachOwl appears as a game-changing tool for businesses seeking to increase sales and lead generation effortlessly. ReachOwl streamlines outreach efforts, saving time and resources while delivering remarkable results.
Follow the simple steps outlined in this blog to get started with ReachOwl today and watch your business rise to new heights.
Remember to adapt your strategies based on performance insights to continuously improve your marketing success with ReachOwl.
Happy reaching out!