Using ReachOWL is amazing to automate the DMs from your Social Profiles, but automating social platforms always comes with the risk of banning or the restriction of your Social Profiles.
So today I present to you an scalable way to do Facebook DM automation at Scale, without getting banned.
Before we proceed, let’s discuss a little bit of background on why profiles are banned or restricted.
When we use our personal profile for automation, our PC or laptop keeps changing IP addresses from our local WIFI network, sometimes you are using it from Home and sometimes from Work, which gives signals to Facebook that someone else might be accessing your profiles. Using Proxies & Constant Browser Profiles this problem can be solved to a very good extent.
So today we will be using proxies and HideMyAcc to create anonymous browser profiles at scale & sending out 500 Cold DMs each day.
We need to send 500 Cold DMs a day and for that we will need 20 accounts, so we can safely send 25 DMs from each account everyday.
Here is how the total initial investment looks like for this setup
– 20 aged Facebook profiles. ($6×20) = $120 (one time)
– 20 proxy IPs per month. ($20) = $20/month
– 20 anonymous browser profiles. ($30) = $30/month (one time)
Total investment for this setup is around $170 to start, and will be reduced to $50/month from the second month onwards. With the ability to reach 15,000 people each day this investment is worth it.
You can purchase the aged Facebook profiles from https://accsmarket.com/en/catalog/facebook
Look for a profile older than 20217 for better reach.

You can purchase 10 IP address of USA/UK/Canada from ProxySeller or InstantProxies at $1

You can purchase the anonymous browser profiles at $29/month from HideMyAcc, you can save 50% if you purchase an annual plan.

Now, I will show you how you can start with this setup.
Once you’ve purchased everything mentioned above, the next step is to start HideMyAcc and set up your first browser profile.
Click on the new profile, name your profile, select your operating system.

Make sure to use Chrome as ReachOWL works with the chrome extension.
Now, go to the proxy section and enter the IP address, Port, Username & Password of first of your ten purchased proxies. Make sure the proxy connection is successful

Go Extensions & Install the ReachOWL extension, if you don’t find it you can download the extension from your Chrome Browser and then upload here.
 And then save the browser profile.
Now you can run this profile and as soon as you do that it will open up the browser window for you. You can log into your first aged Facebook account & run the ReachOWL campaigns to start automation on this first account.

Make sure to complete the Facebook profile, like uploading a profile picture, and filling out as much information as possible to make it look authentic.
Say Hello to Cloud, Goodbye to VPS & Anti-Detect Browsers
No More VPS Required:
With this upgrade, you no longer need a VPS to run background processes, meaning you can shut down your computer or close your browser without interrupting your outreach campaigns.
With the new cloud technology, you can easily configure your proxy directly within the ReachOwl settings, and it will automatically integrate with your browser. This means you no longer need to use an anti-detect browser. The cloud system runs outreach campaigns efficiently, even in the background, without needing to keep your browser or computer open.
Here’s how you can set it up:
Open a New Chrome Profile:
Create a new Chrome profile and give it a name, but don’t log into any accounts yet.

Configure the Proxy:
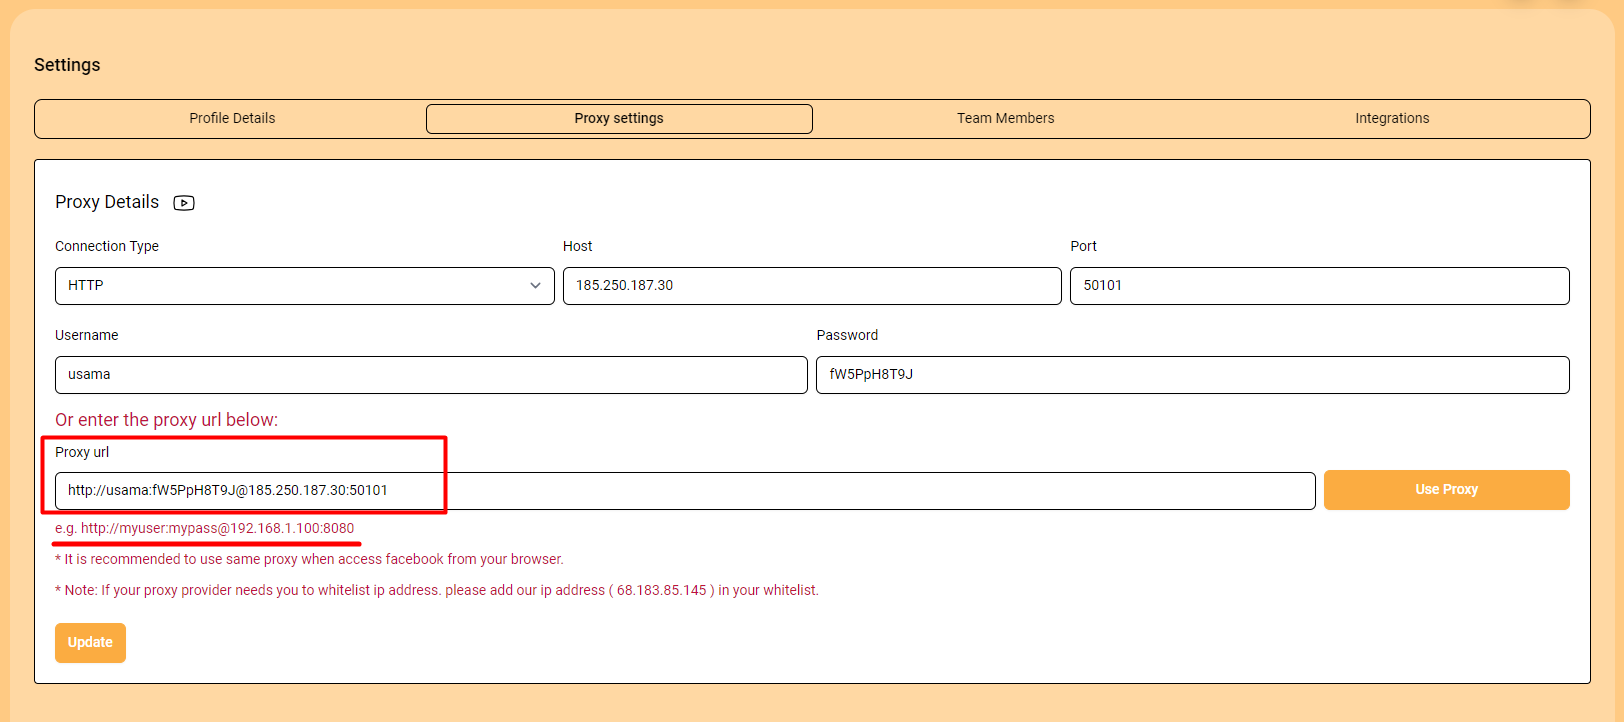
Go to the Settings & Team option and enter the proxy section.


Update Your Proxy:

Using Proxies without The Need of Anti-Detect Browser:

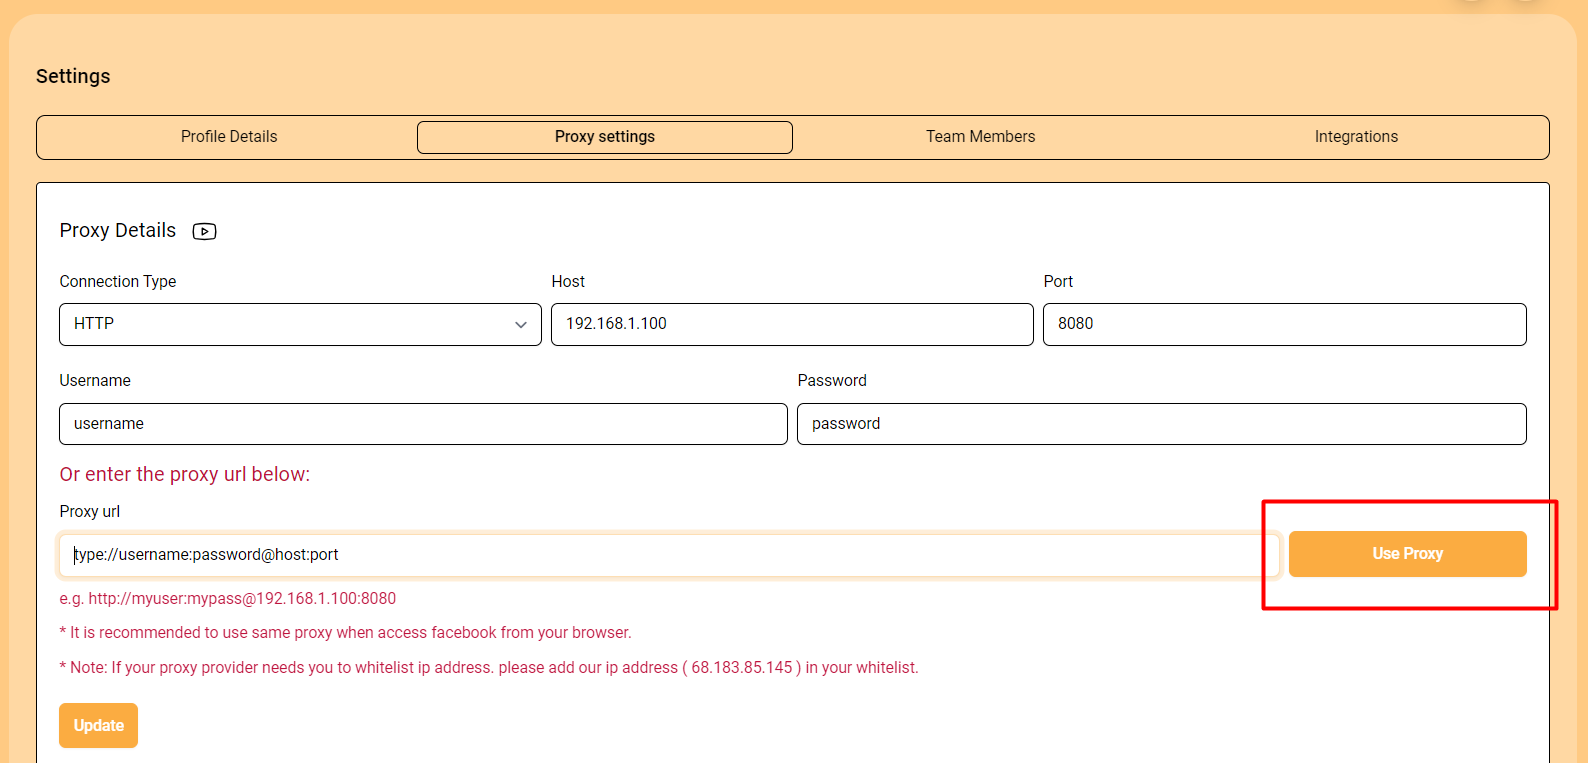
The proxy you’ve configured will be applied to your browser, and from then on, your browser will run according to the configured proxy settings.
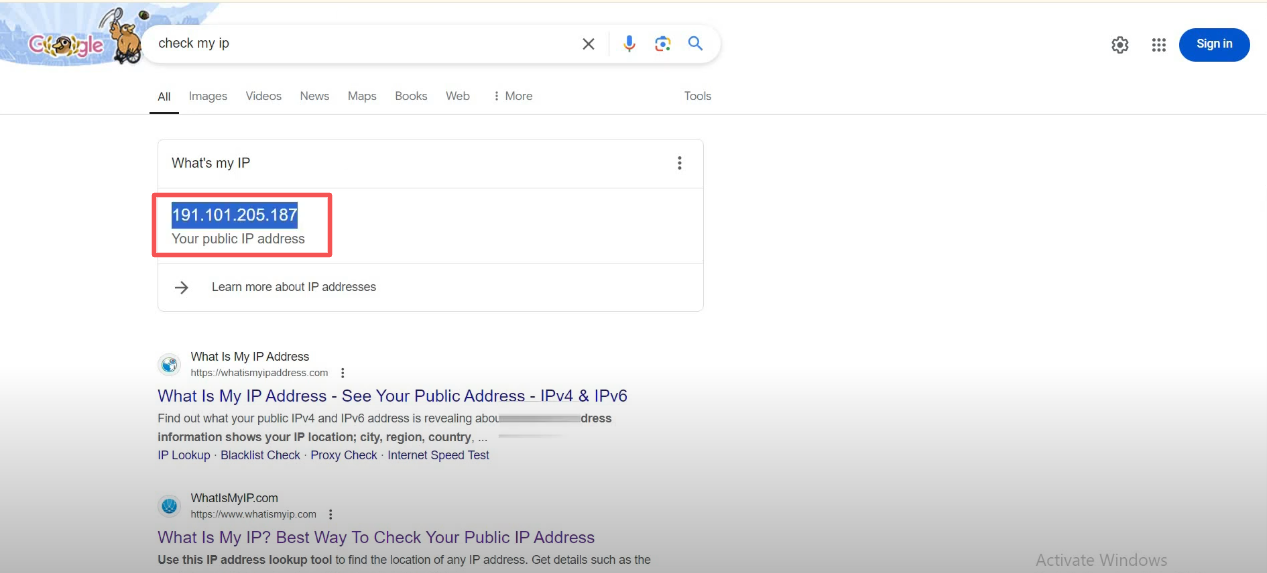
To ensure your proxy is working, you can check it on Google after using the “USE PROXY” option. You’ll see the same proxy we just set up in ReachOwl is now running on your browser.
Verify Your Proxy:

ReachOwl’s innovative features eliminate the need for anti-detect tools, allowing you to perform smooth outreach effortlessly and focus on results.

